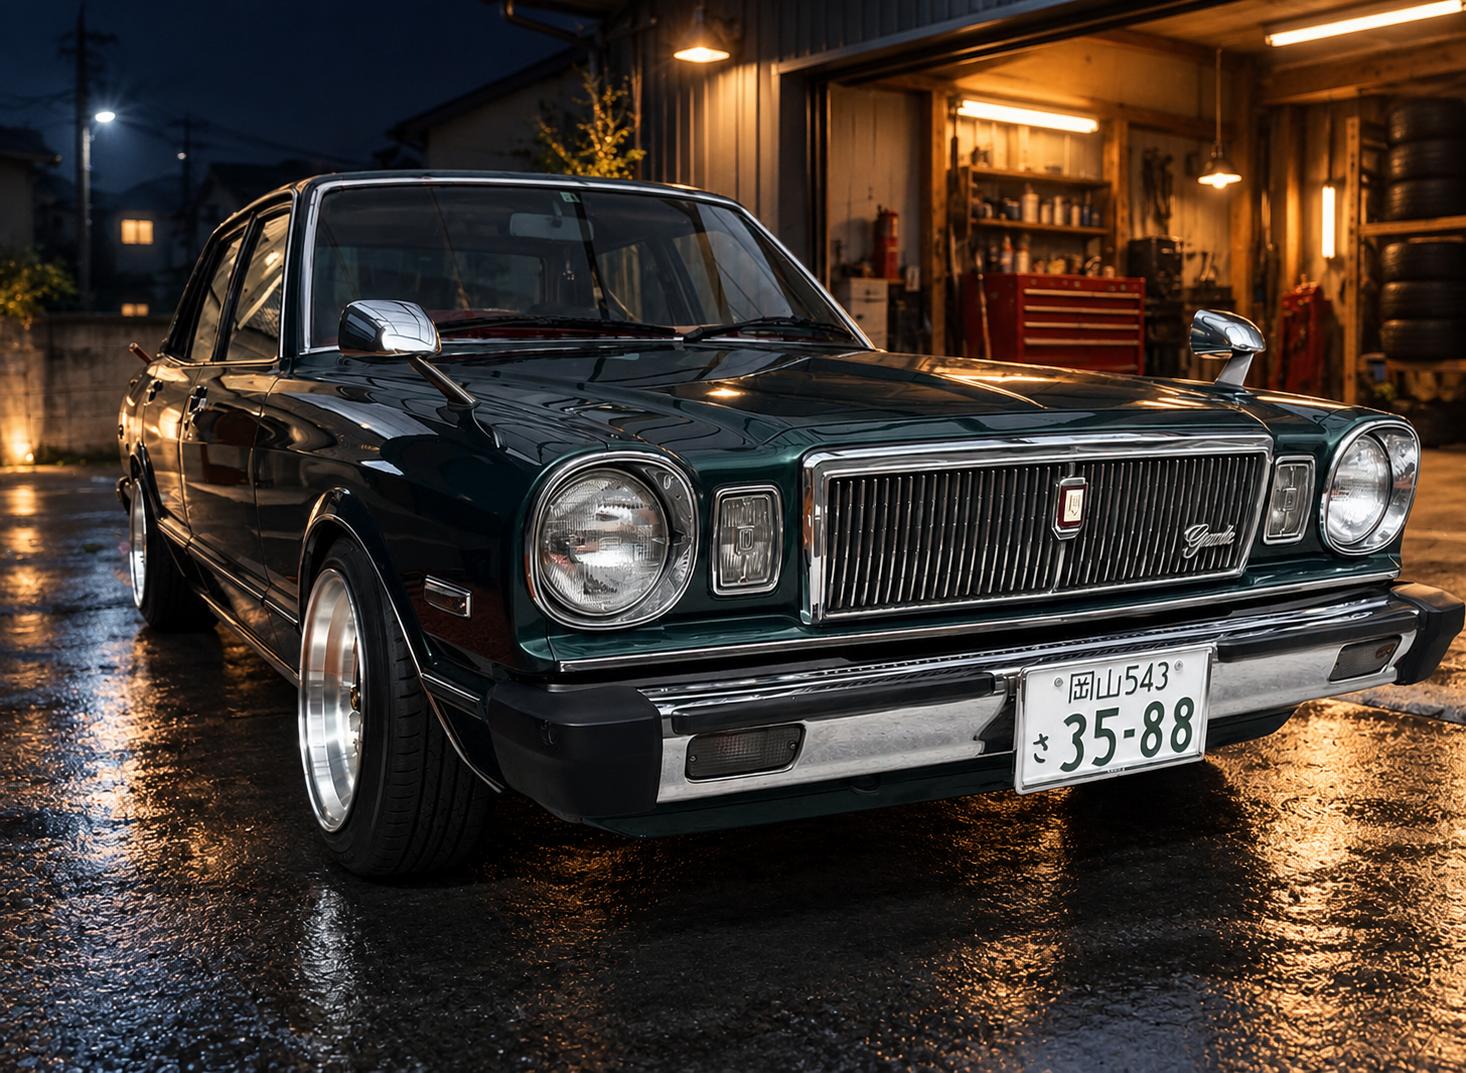
Автор — Pim25
Основой карт (панелей) дверей в наших машинах является оргалит, или, по-другому, ДВП (древесно-волокнистая плита).
Этот материал, как известно, боится влаги и со временем коробится. Ситуация усугубляется тем, что при кузовных и других ремонтах дверей мастера не всегда возвращают на место/меняют полиэтиленовую плёнку на герметике между двп-обшивой и металлом двери – а это прямой путь к осаждению конденсата и дальнейшему короблению. Кроме того, эти панели иногда задираются из-за многократного задевания при входе-выходе (особенно на двери со стороны водителя), а также банально рвутся при снятии (при разборке двери, например).
В итоге карты дверей на наших машинах могут представлять собой довольно жалкое зрелище.
И если с финишной внутренней отделкой двери сделать что-либо трудно (но всё-таки можно – об этом ниже), то основу её мы можем заменить на более ровную и устойчивую к влаге.
Вот как это сделал я.
Данную операцию рекомендую проводить после производства следующих работ (если они, конечно, были запланированы):
— реставрация дверных петель – описание по этой ссылке;
— регулировка положения двери в проёме;
— регулировка положения стёкла в проёме (особенно актуально для «купе»);
— смазка внутренней части механизма замка;
— проверка актуатора замка;
— вибро-шумо-звукоизоляция внутренней части двери;
— замена/ремонт наружных ручек двери;
— замена/ремонт личинок замков;
— монтаж проводки доводчика стёкол.
Первым делом демонтируем с двери следующие детали: подкладку под внутреннюю хром-ручку (один мелкий шуруп), подлокотник (два силовых шурупа под заглушками), ручку опускания стекла – если есть (пружина-фиксатор на оси), кнопку запора замка (рамку скользящего запора у «купе» Lock/Unlock).
Затем плоским пластиковым инструментом по очереди освобождаем клипсы по кругу, вводя инструмент между обшивой и дверью (верхняя часть обшивы при этом остаётся надетой на дверь).
Кроме того, на данном этапе может также потребоваться откручивание одного-двух болтов, прячущихся под заглушками, а также снятие сквозных клипс.
Когда обшива освобождена, двигаем её вверх и снимаем с двери. Полностью, правда, она не снимется, так как нужно ещё отсоединить проводку кнопок управления стёклами и красного фонаря подсветки.
После этого окончательно отсоединяем панель от двери и кладём её на подходящую горизонтальную поверхность.
Далее демонтируем с обшивы нижний пластиковый карман, панель под подлокотником и фонарь двери.
Обратите внимание – часть деталей обшивы закреплена со стороны салона, и без их демонтажа обшиву не снять. А часть (нижний карман, панель с кнопкой опускания стёкол, нижняя часть подлокотника) закреплена шурупами с внутренней стороны обшивы – их можно открутить только на снятой панели.
Рекомендую очень внимательно относиться к сбору выкрученных шурупов, а также снятых металлических зажимов для проводов и клипс (они тоже у нас металлические).
Сама обшива представляет собой кусок двп, к которому в верхней части прикреплён металлический профиль С-образного сечения. Со стороны салона эта конструкция покрыта трёхсоставным покрытием – в нижней части карман и «ковёр», в середине – что-то вроде «плюша», а верхняя часть представляет собой тонкий винил (по крайней мере, так устроено в салоне Grande).
Следуя дальше, необходимо перевернуть снятую обшиву – на обратной стороне мы увидим, что металлический профиль прикреплён к двп стальными скрепками с обратной стороны (то есть мы видим прижатые к двп концы скрепок).
Это не простые скрепки – они сделаны из очень хорошей стали, и я советую вам действовать с ними аккуратно, но уверенно – для того, чтобы можно было использовать их повторно (замена их клёпками в данном узле будут неприемлема по причине неподходящей формы последних). Лучше для отгибания концов применить кусачки – они в данном случае «ухватистее», чем пассатижи:
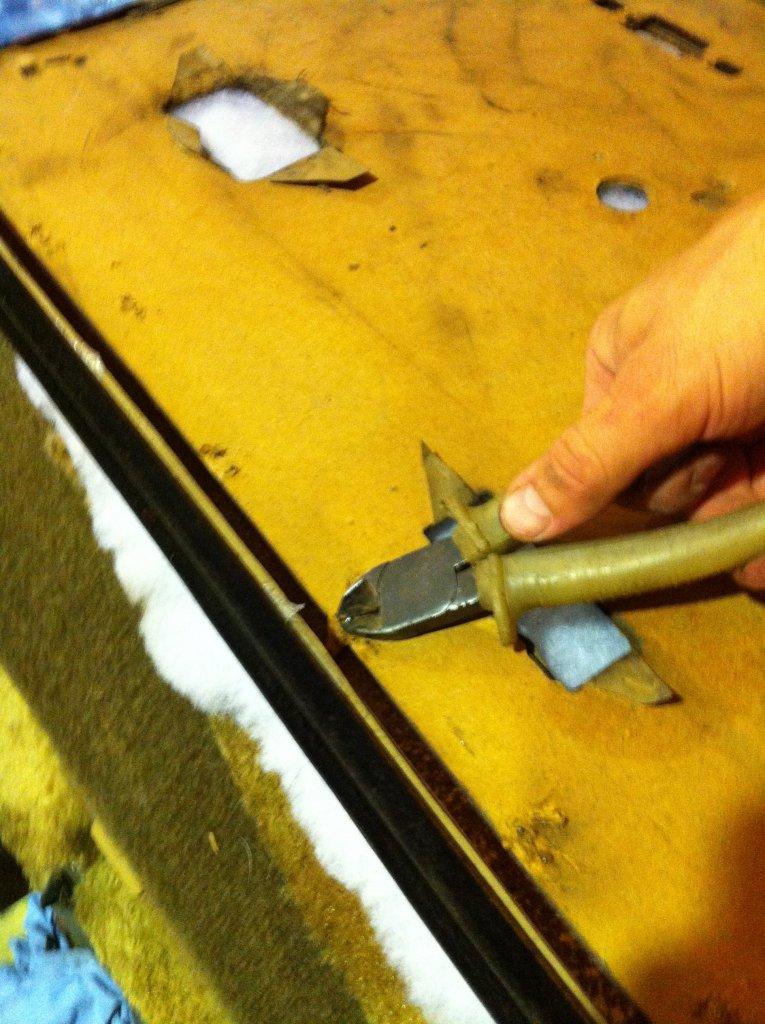
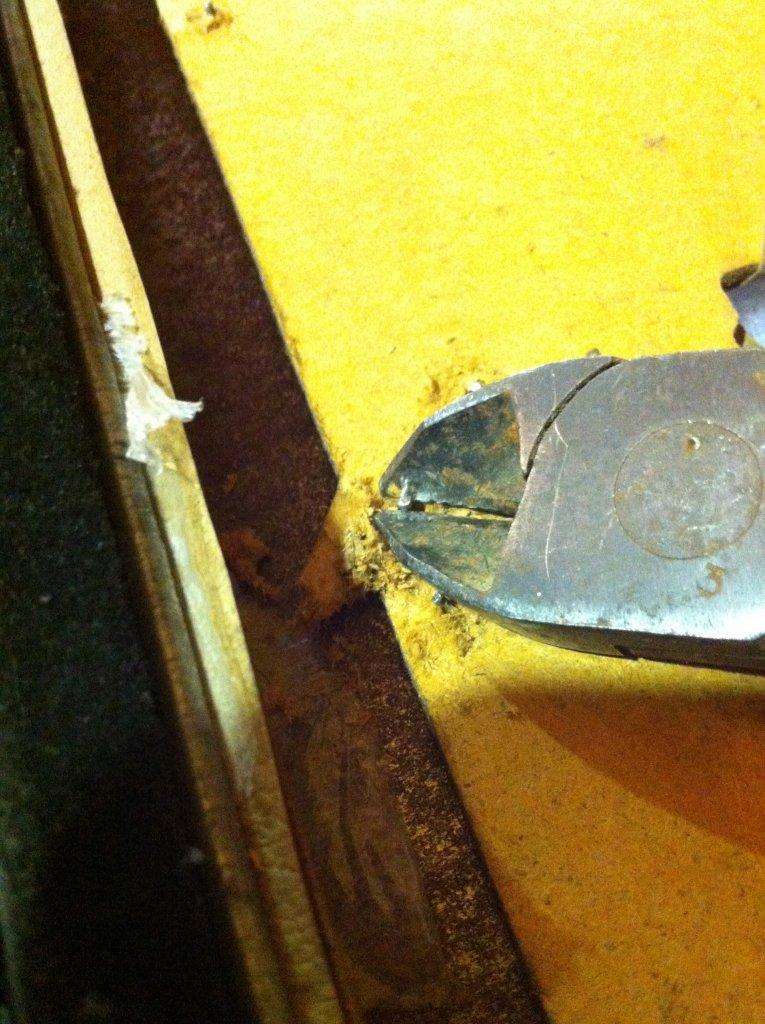
После отделения двп снимите все крепёжные детали с внутренней поверхности обшивы (покеры, клипсы, крючки и т.п.).
Потом надо аккуратно отогнуть по кругу завёрнутые и приклеенные края винила, а также винил, завёрнутый за края замкнутых вырубок под ручку замка, фонарь и т.п. – он там также обёрнут вокруг краёв и приклеен. Таким образом мы освобождаем основное полотно.
Затем уже осторожно отделяем винил от всей плоскости обшивы. Основная трудность здесь – аккуратно «оторваться» от нескольких параллельных полос приклейки к двп.
Внимание! При этом винил обшивки остаётся приклеенным к верхнему металлическому профилю!
Металлический профиль мы не отделяем от винила вовсе.
Далее очищаем внутреннюю поверхность обшивки от остатков поролона.
Следующий шаг – хорошенько вручную выстирать обшивку с хозяйственным мылом или другим моющим средством, положив её на плоскость:
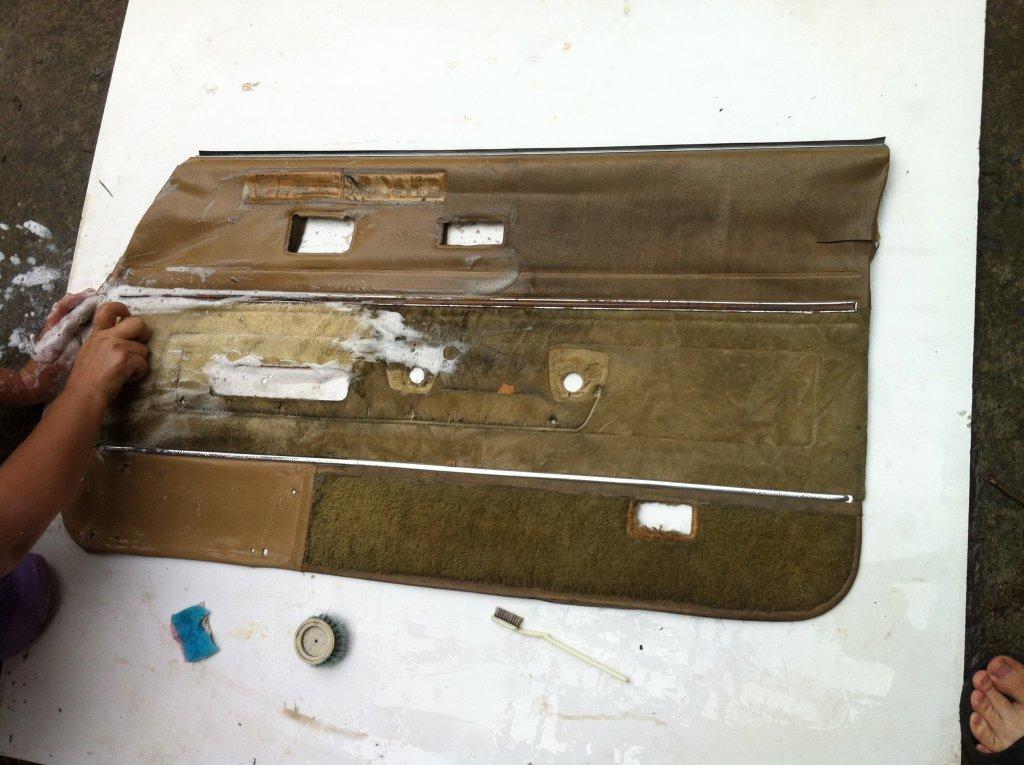
Разница между выстиранной и грязной деталью будет визуально ощутима 🙂
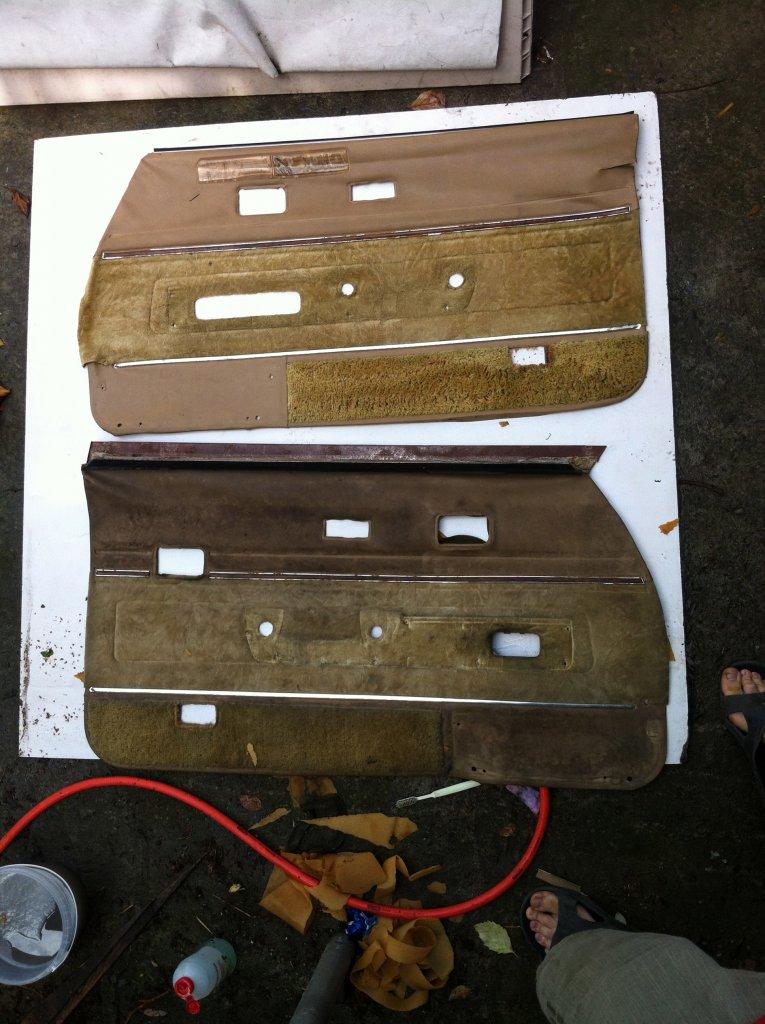
После стирки оставляем обшивку сушиться, а сами тем временем приступаем к изготовлению пластиковых копий родных двп-основ.
В качестве новой основы используем листовой пористый пластик толщиной 4 мм типа Foamex — вот такой, например (ссылка для примера):
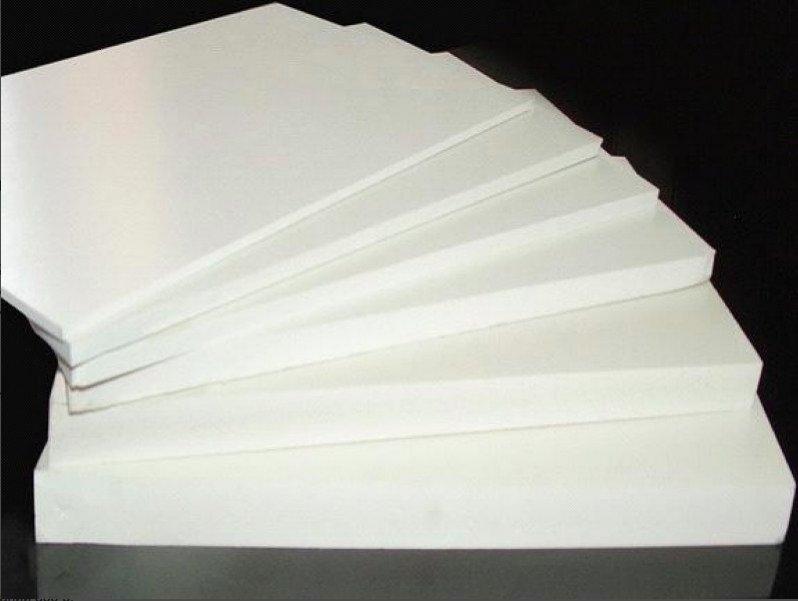
Толщину я подобрал аналогичную родному двп – 4 мм.
Для копирования крепим родную основу сверху к листу пластика с краю, и начинаем обводить подходящей ручкой/фломастером абсолютно все вырубки и отверстия, а также общий контур:
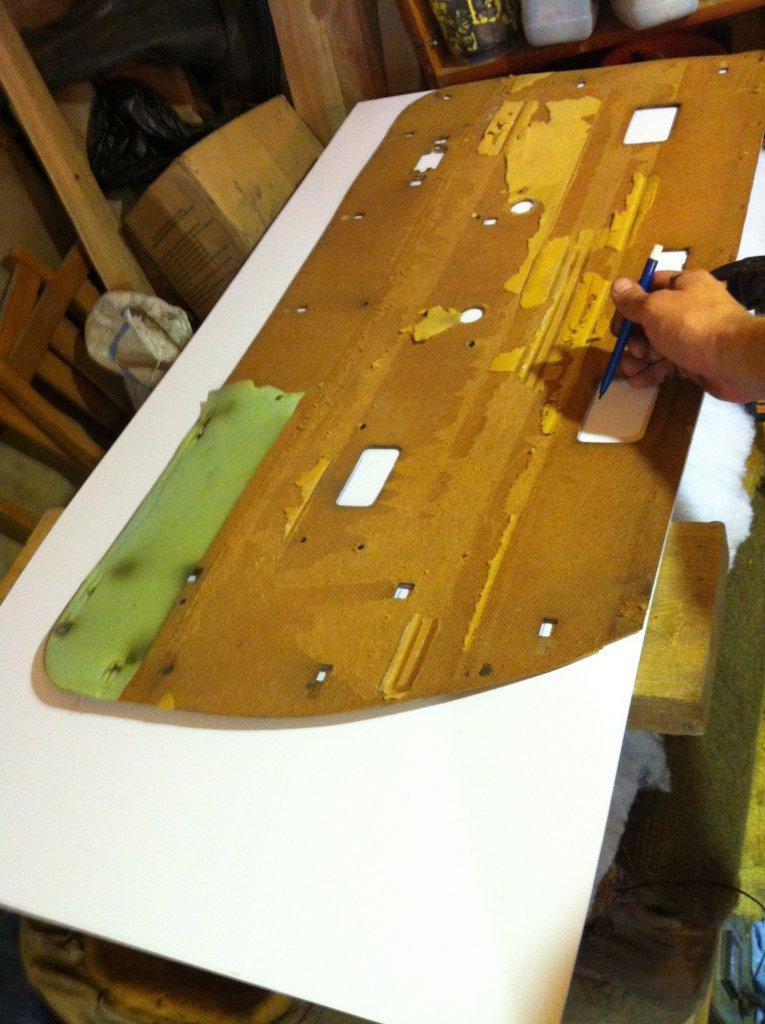
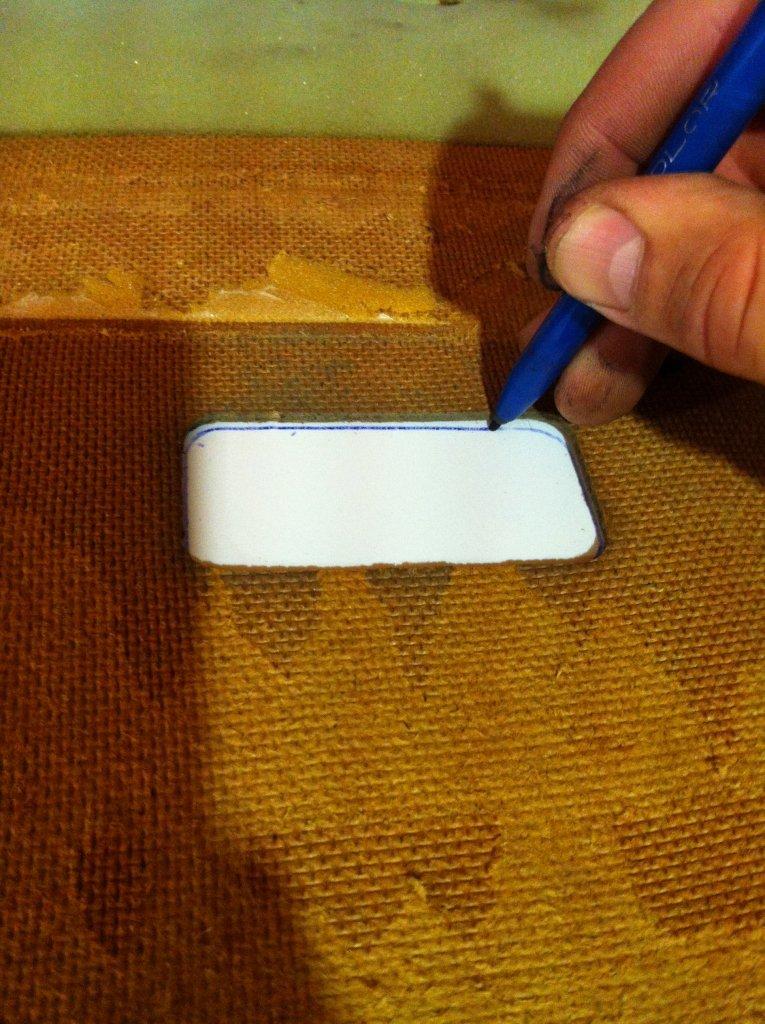
После переноса вырубок и отверстий аккуратно вырезаем их.
Пористый пластик такой толщины легко пилится полотном по металлу (вручную – т.е. лобзик не нужен), а также режется твёрдым строительным ножом.
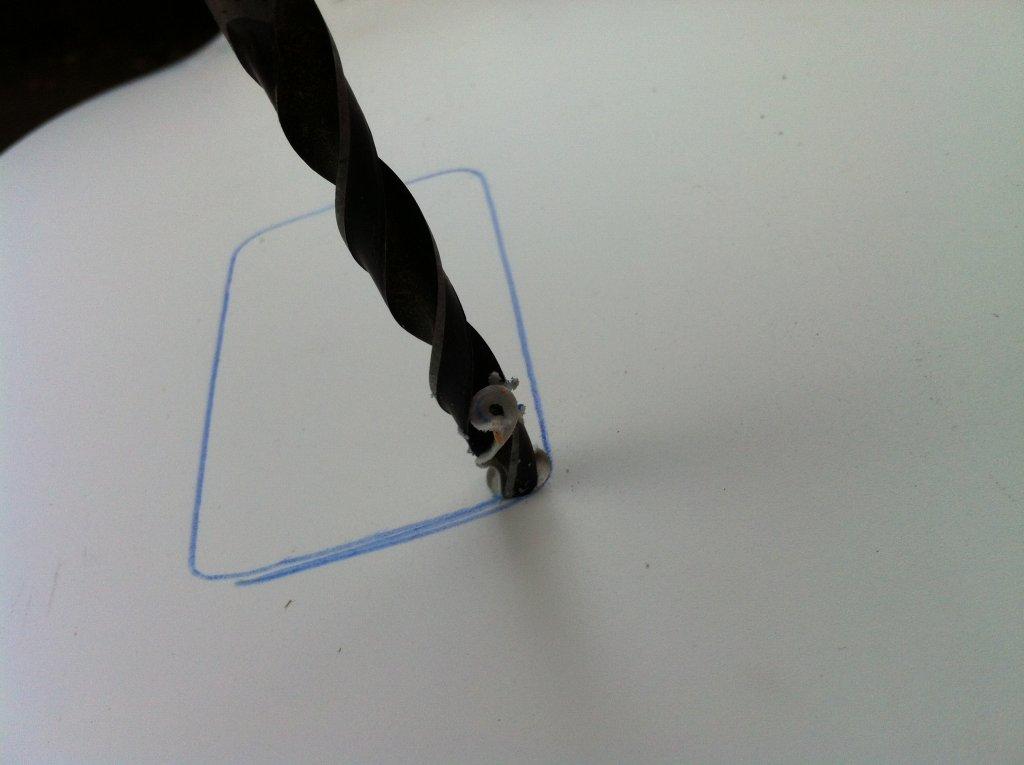
Для копирования скруглённых углов и для захода пилки сверлим угловые отверстия:
В итоге для двух карт получаем две зеркальные копии основ из пластика.
Я написал «зеркальные», но каждую из них нужно копировать только с соответствующего оригинала!
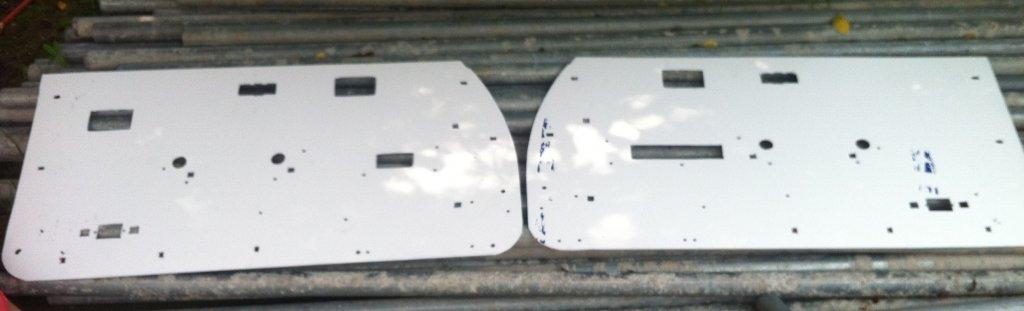
Сам пластик может быть чистым белым или ламинированным, как это было у меня (вы можете заметить синюю ламинацию на некоторых фото). Полагаю, это не имеет значения — в конце концов я пришёл к выводу, что хорошо приклеенную на фабрике ламинирущую плёнку можно и не удалять (не путайте с защитной прозрачной плёнкой, которая нам не нужна и отделяется перед копированием!)
Закончив вырубку новой детали, обязательно подложите её под оригинал (двп) и убедитесь, что все необходимые отверстия и проёмы проделаны, а внешние края старой и новой основ совпадают.
Края панели, а также края вырезанных больших вырубок следует загладить наждачной шкуркой для безопасного облегания (оклеивания) их винилом обшивки в дальнейшем.
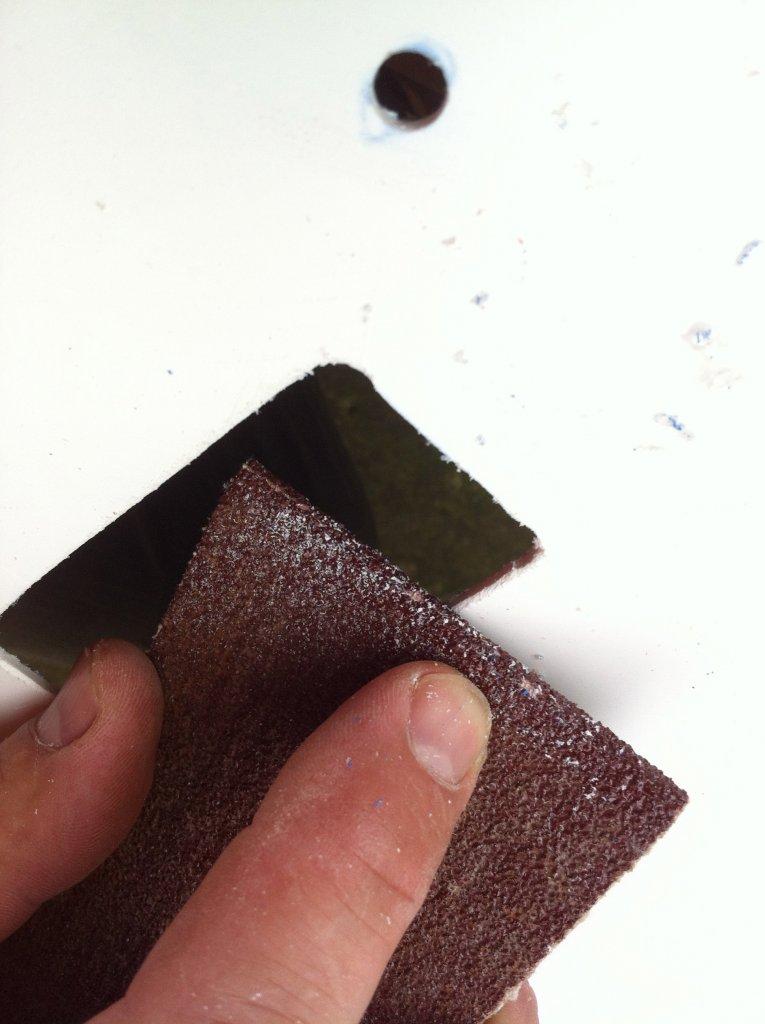
Итак, мы имеем готовый дубликат основы.
Следующая задача – прикрепить к нему обшивку – чистую и уже высохшую.
Начинаем с монтажа к пластику металлического профиля (верх обшивки).
Чтобы обнажить его край, отворачиваем и отодвигаем винил в сторону насколько можно – чтобы увидеть места крепления (парные отверстия) в металле.
Напомню – мы будем крепить профиль теми же мощными скрепками, которые мы сохранили и приберегли для повторного использования.
Сначала аккуратно выпрямляем их пассатижами до прямых углов на сгибах.
Затем нам нужно установить скрепки в заводские отверстия в металле и далее как-то «пройти» ими через пластик.
На заводе их, скорее всего, вставляли автоматическим степплером, а у нас такого мощного нет (да он нам и не нужен).
Поэтому находим сверло диаметром около 1 мм (в крайнем случае – тонкое шило), и аккуратно проделываем сквозные отверстия в пластике в точном соответствии с отверстиями для скрепок в металле – можно наложить сверху на пластик старый двп и проделать отверстия, используя двп как шаблон.
Затем вставляем скрепки – как и на заводе, со стороны металла. Сам металл накрывает пластик при этом точно так же, как это было изначально – со стороны салона.
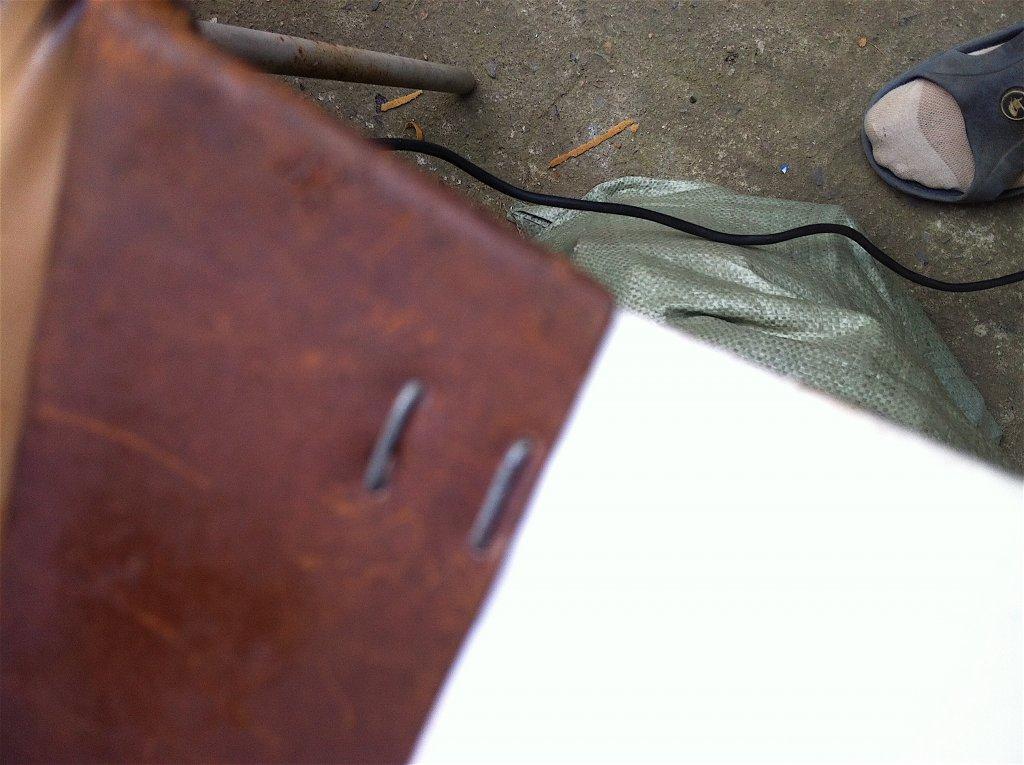
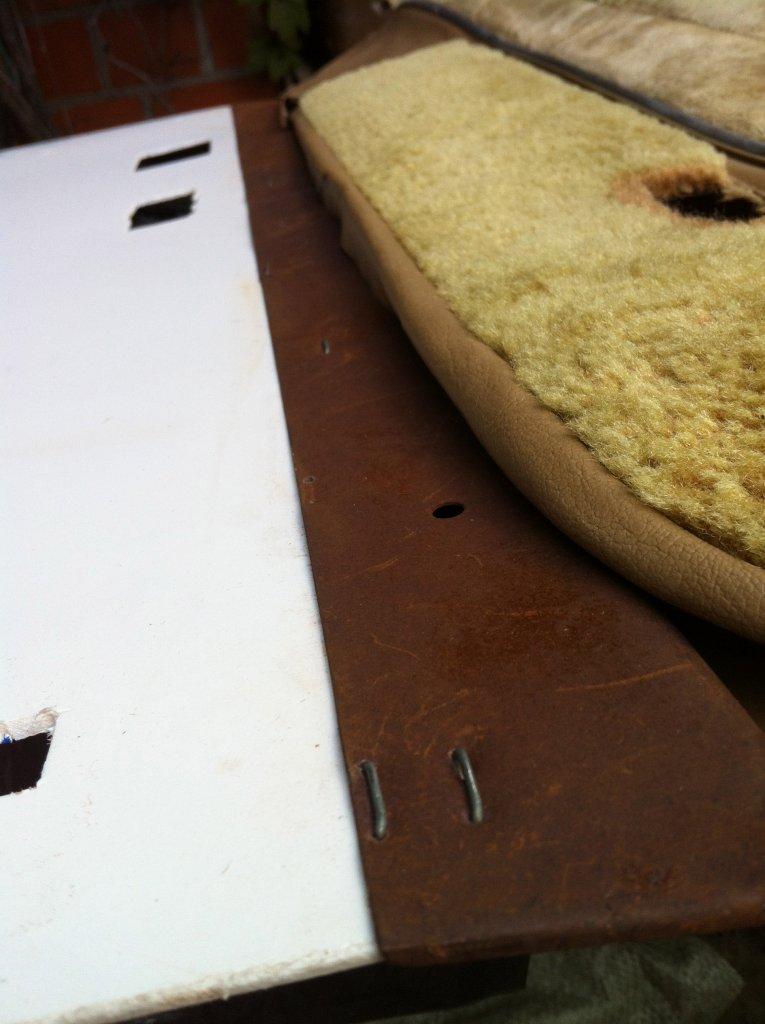
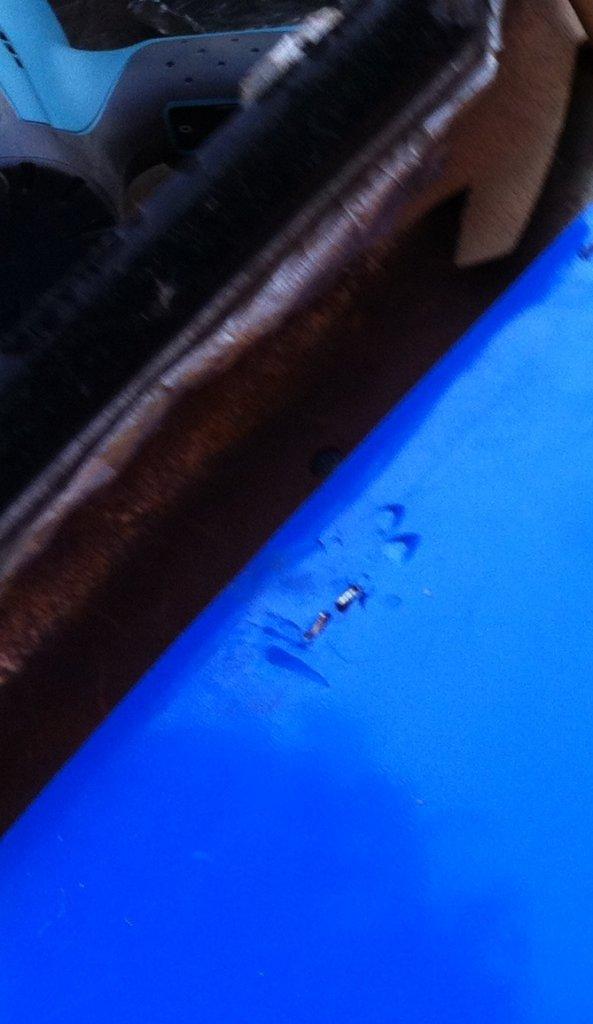
Потом прижимаем эти две детали к столу (металлом книзу) и ударами небольшого молоточка загибаем усики скрепок со стороны пластика, получая довольно прочное соединение, не уступающее заводскому (на фото коричневое – это металл, синее и белое — пластик):
Итак, верхняя металлическая часть обшивки прикреплена к новой основе – но это только половина работы!
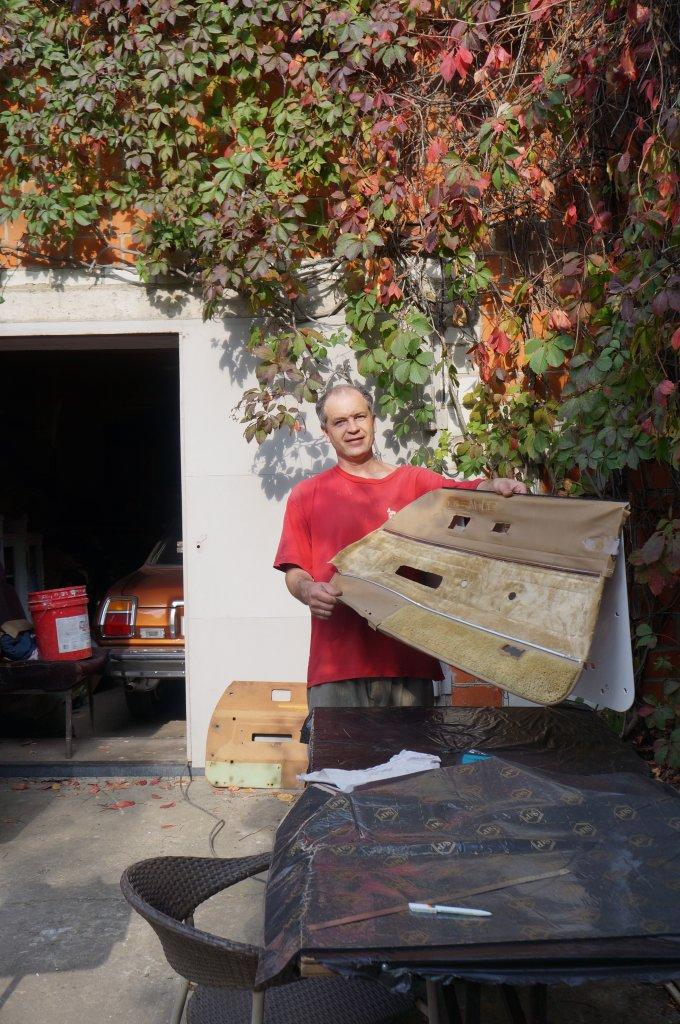
Затем нам нужно решить проблему наполовину разложившегося родного поролона.
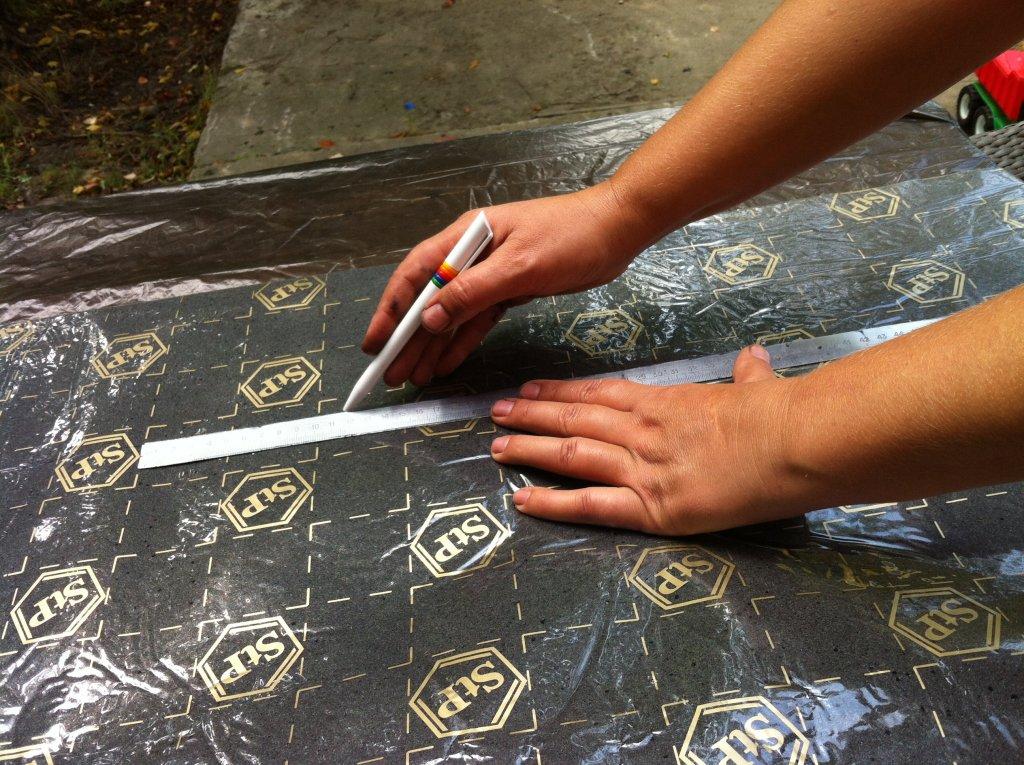
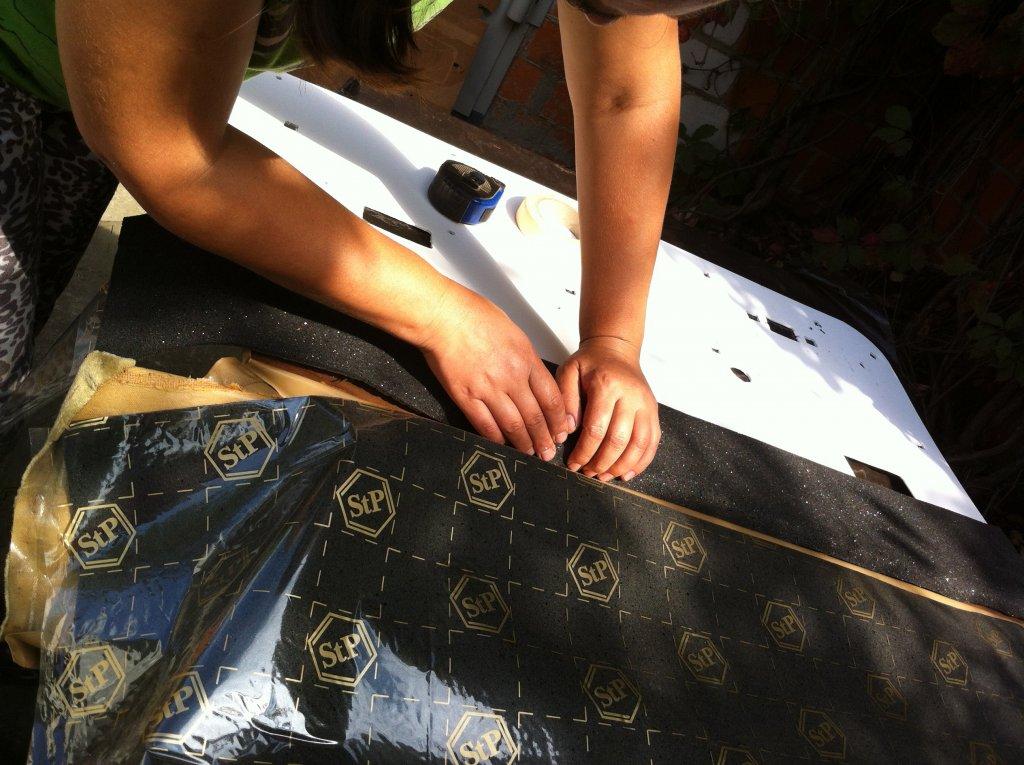
Для его замены используем материал «Бипласт» от STP толщиной 5 мм:
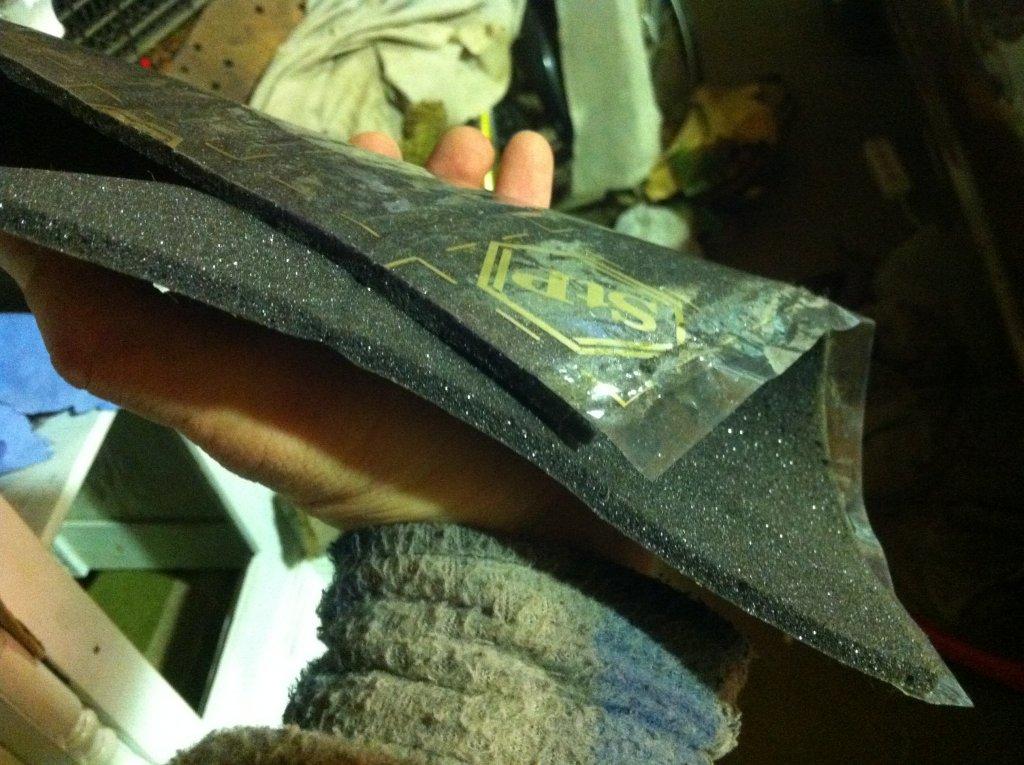
Этот материал представляет собой мягкий, легко сжимаемый вспененный полиуретановый «поролон» на самоклеящейся основе, и для наших целей подходит идеально.
А наша цель в данном случае – поместить между пластиковой основой и виниловой обшивкой слой (или несколько слоёв) поролона взамен штатного, утратившего свои функции.
Но, как вы уже, наверное, догадались, тут тоже не всё так просто.
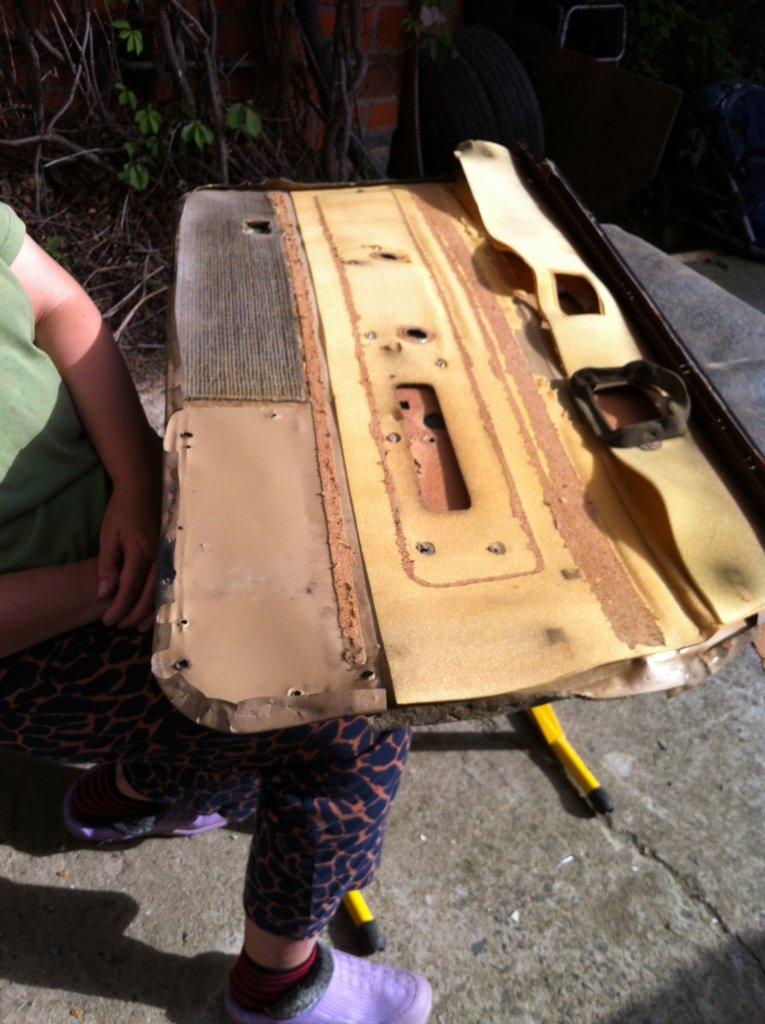
Дело в том, что штатный способ крепления обшивки, как мы убедились при разборке, подразумевает что-то вроде частичной термо-склейки обшивки с основой по нескольким линиям, параллельным земле.
Такое крепление создаёт некую объёмность обшивке, и дополнительно держит её на основании.
Получается, что по этим линиям поролон под обшивкой нам не нужен.
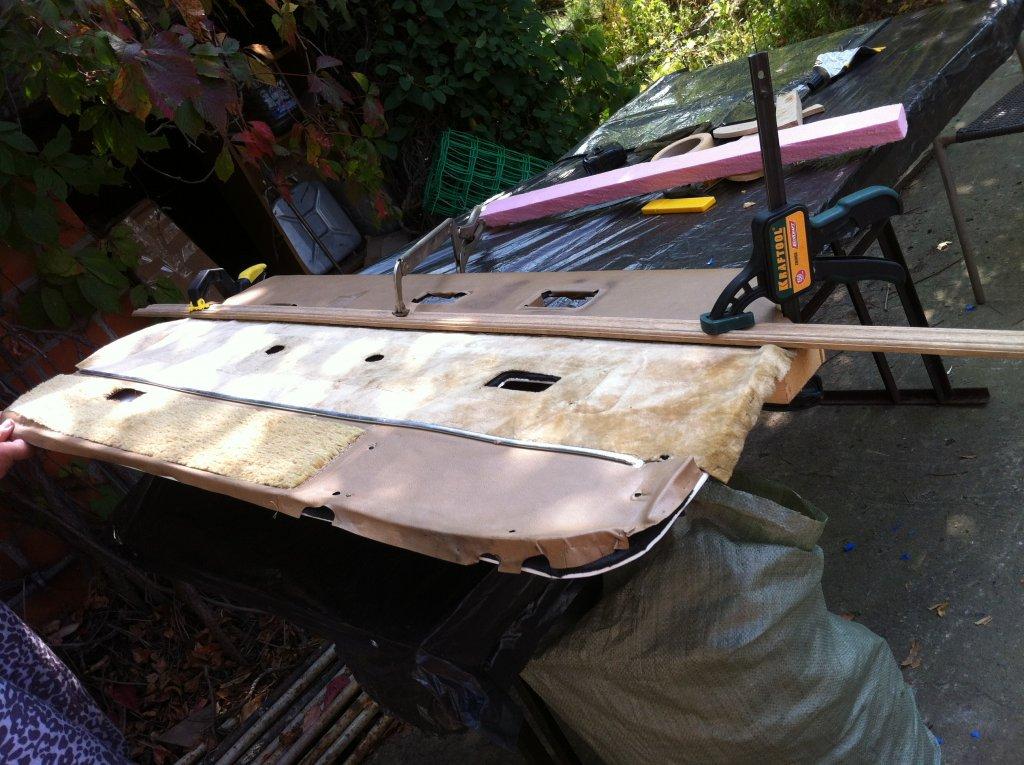
Поэтому мы клеим к нашей новой пластиковой основе где один, а где два слоя «Бипласта» (присмотритесь – кое-где родной поролон лежал в несколько слоёв), но не клеим «Бипласт» по тем линиям, которые на обшивке служили для термо-склейки.
А непосредственно по этим линиям мы стараемся приклеить тонкий родной винил прямо к пластику. Клей можно использовать, например, «Момент» — прозрачный полиуретановый.
Для избирательного прижима используем подходящую конструкцию из деревянных реек и струбцин:
Одновременно натягиваем и загибаем края винила (не исключено, что он после стирки немного «подсядет» — уменьшится в размерах на несколько миллиметров).
Работа эта непростая, но нужно постараться сделать её максимально аккуратно.
Тут не обойтись без супер-клея, струбцин (прищепок?), промышленного фена, а также умелых женских рук 🙂
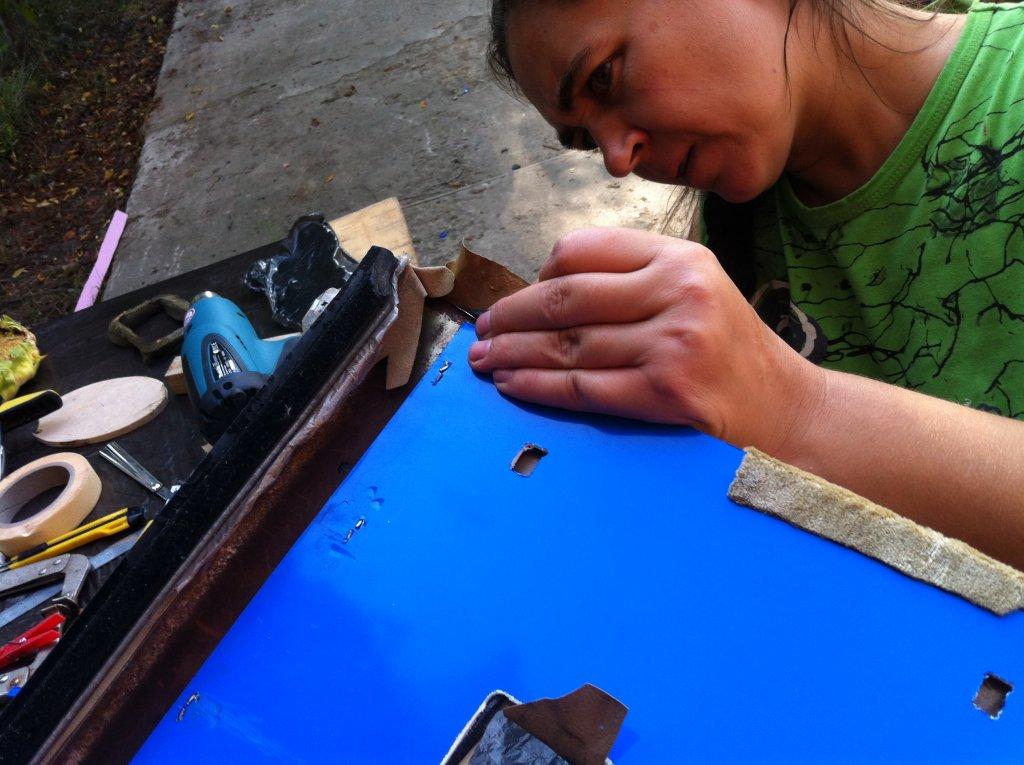
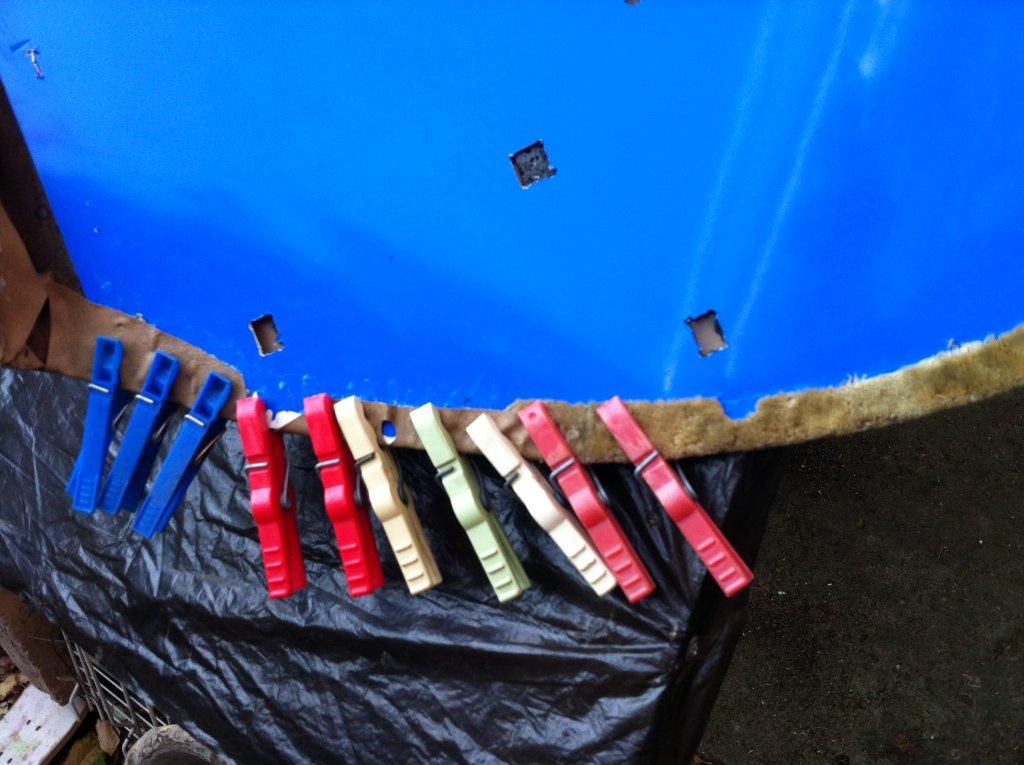
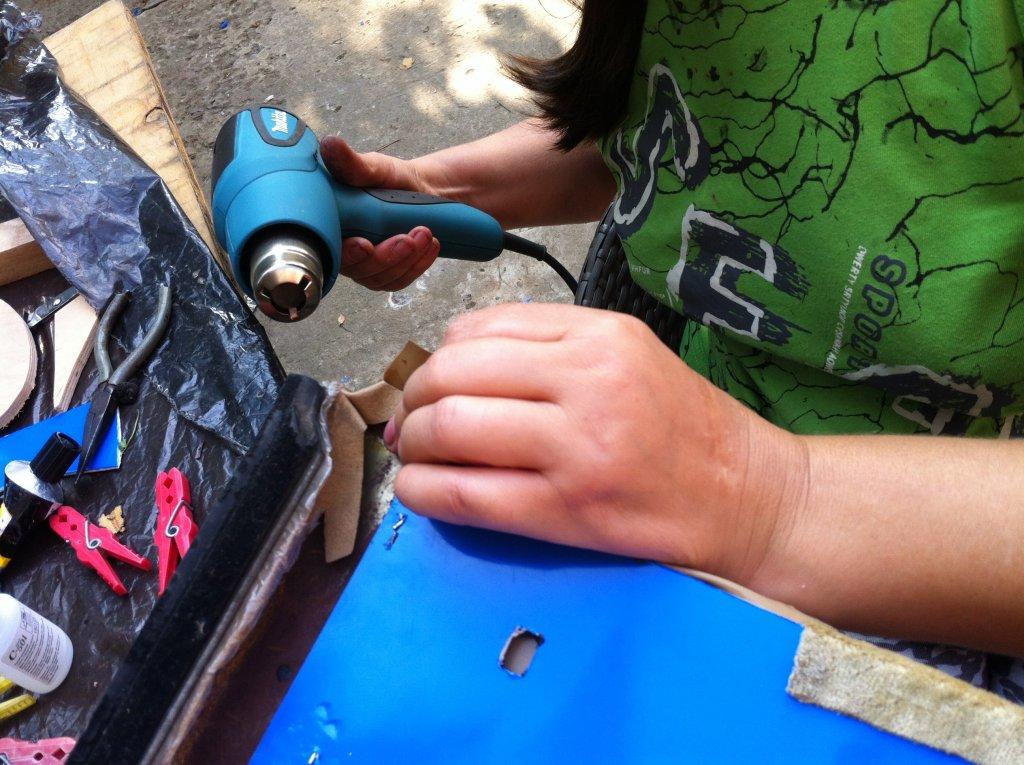
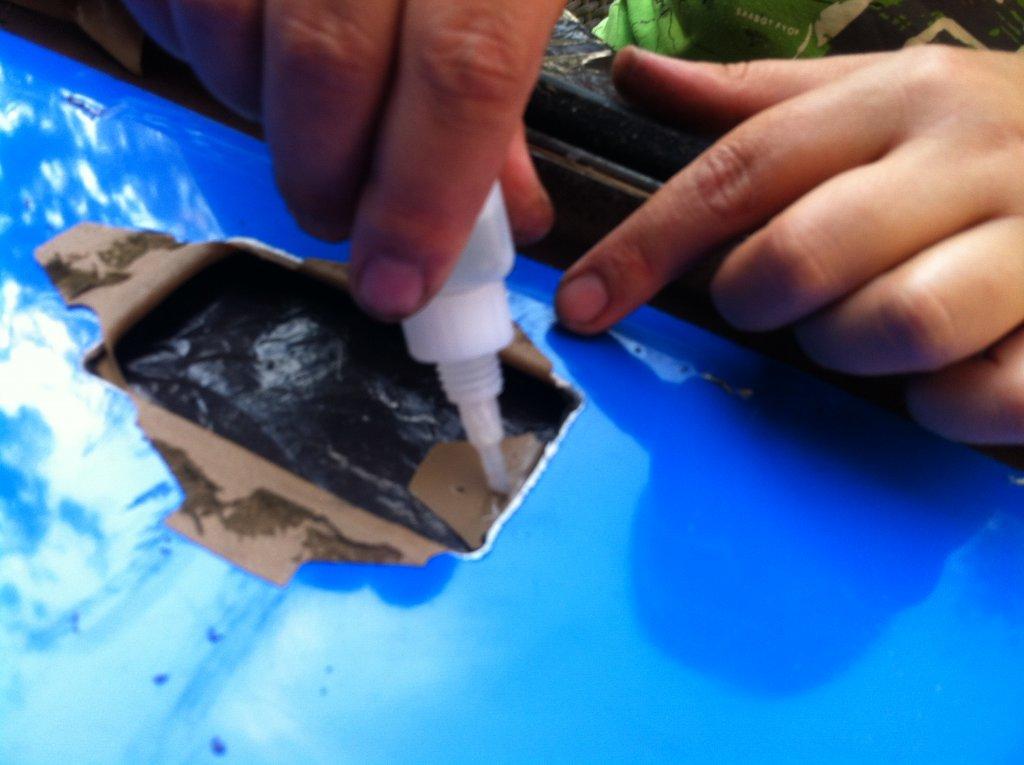
Также загибаем и приклеиваем края винила по большим вырубкам – там, где это было сделано на заводе:
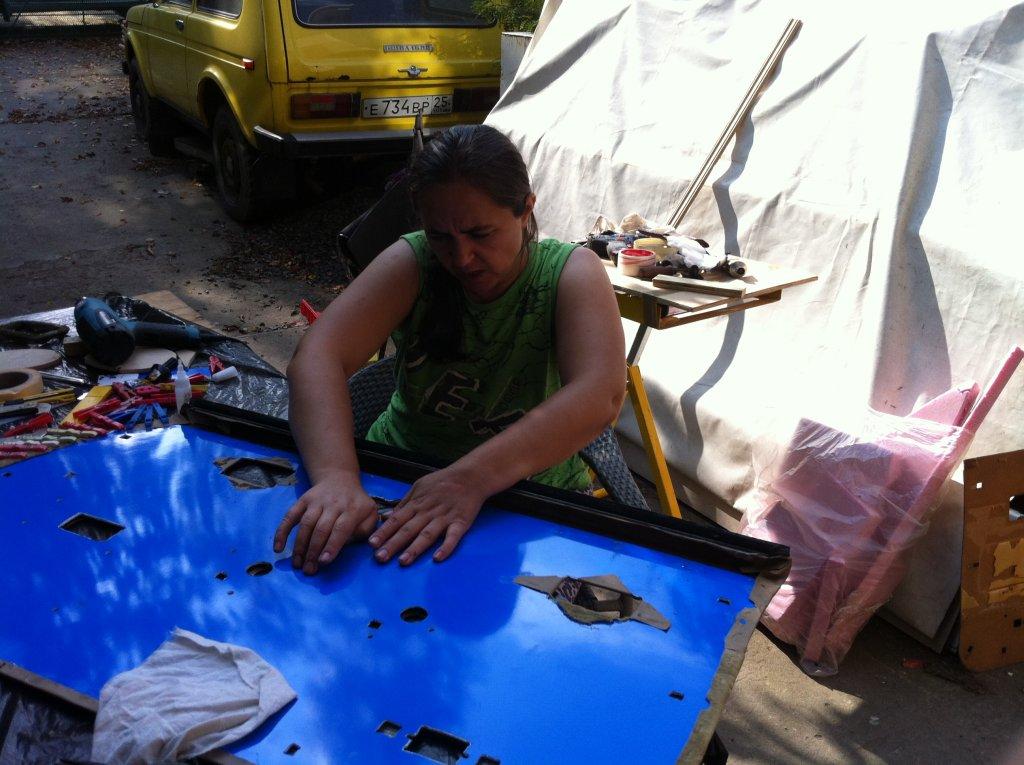
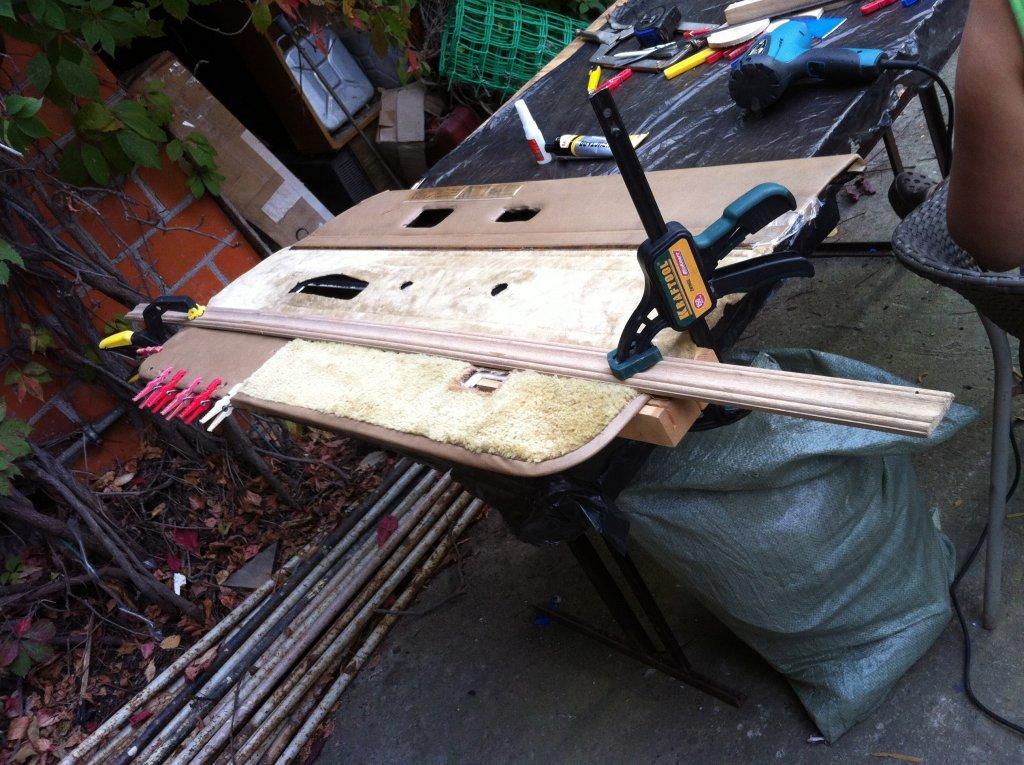
После проведения этих мероприятий мы получаем идеально ровную, не подверженную влиянию влаги панель (обшивку) двери, к которой нужно прикрепить всё остальное, подготовив тем самым её к установке.
Первым делом, естественно, устанавливаем те детали, которые крепятся изнутри шурупами – нижний карман, низ подлокотника и т.п.
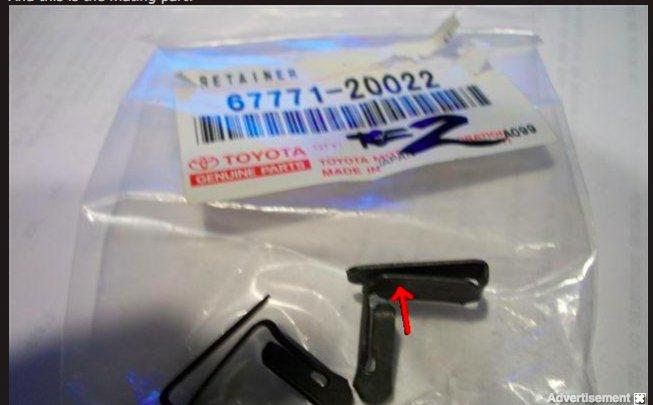
Если в процессе подготовки обнаружилось, что у вас не хватает металлических клипс для крепления обшивы – их можно заказать отдельно по номеру 67771-20022:
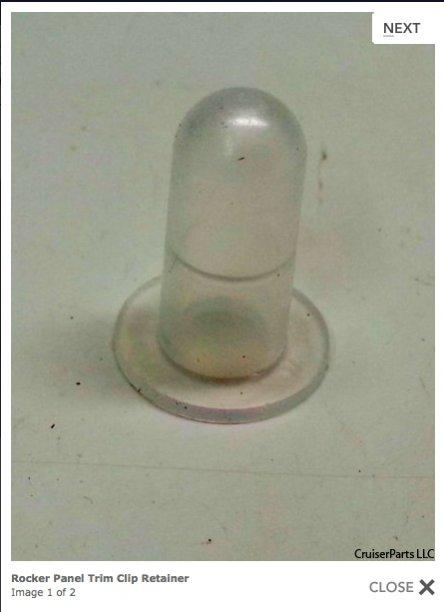
Хотя чаще выходят из строя (рвутся) ответные пластиковые части этого соединения – они вставлены в металл двери (кузова).
Их можно заказать по номеру 67772-22010:
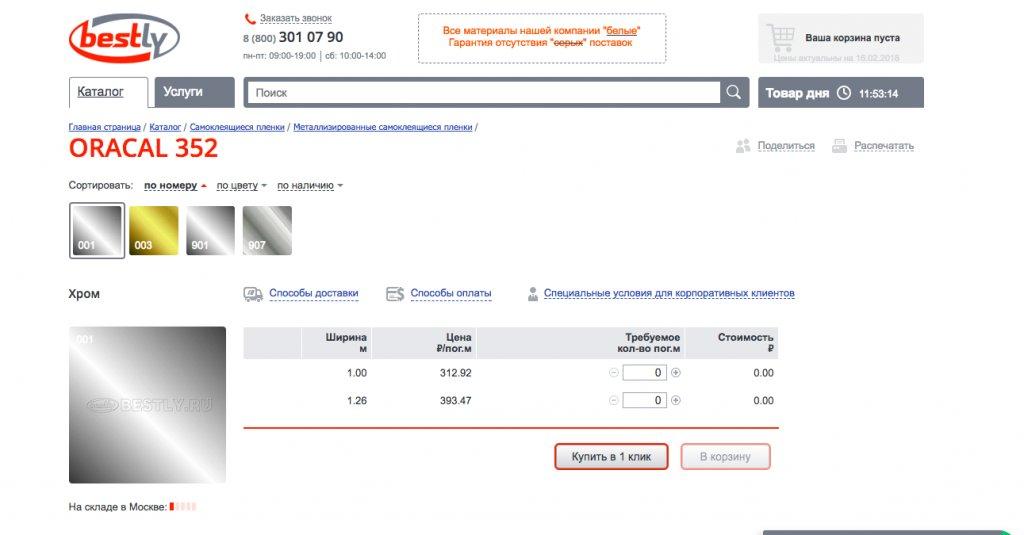
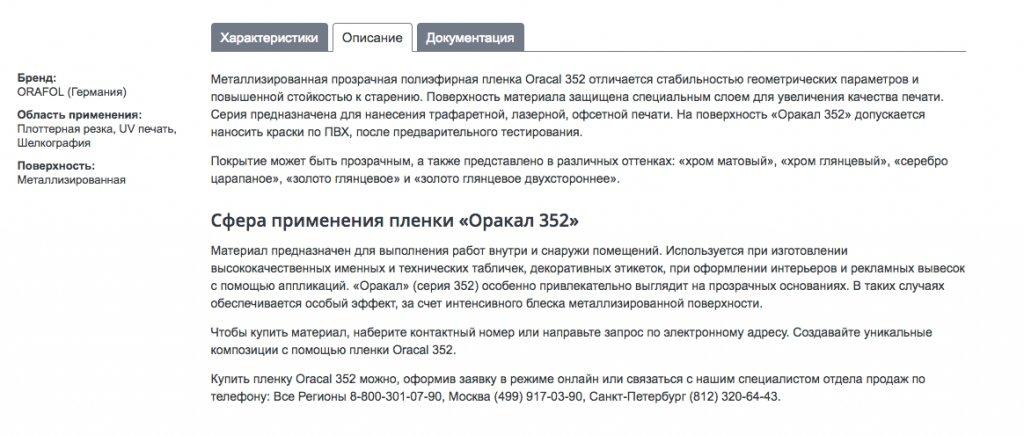
На обшиве также имеются декоративные «хромированные» полоски – и часто они тоже в неважном состоянии. «Хром» на поверку оказывается зеркальной плёнкой, которая местами отклеивается и шелушится.
Свои полоски я не трогал, но тем, у кого с ними совсем плохо, я бы посоветовал удалить старую плёнку полностью и наклеить новую зеркальную самоклеящуюся, вроде такой:
Теперь панель вроде бы готова к монтажу.
Однако перед установкой отреставрированной карты на место необходимо обязательно восстановить влагоизоляцию на двери (или на задней боковой панели кузова «купе»).
Как это сделать — по этой ссылке
Теперь можно окончательно установить обшиву на место.
Надеваем её сверху, от стекла.
Затем, применяя только силу рук (кулака :), последовательно проходим все клипсы по кругу, защёлкивая их до конца. Закручиваем, где это нужно, заводские болты с заглушками.
Затем монтируем на обшиву всё снятое ранее.
А про реставрацию панелей с надписями на ручках можно прочитать тут.
Комментарии
Пока нет одобренных комментариев.