Автор — Pim25
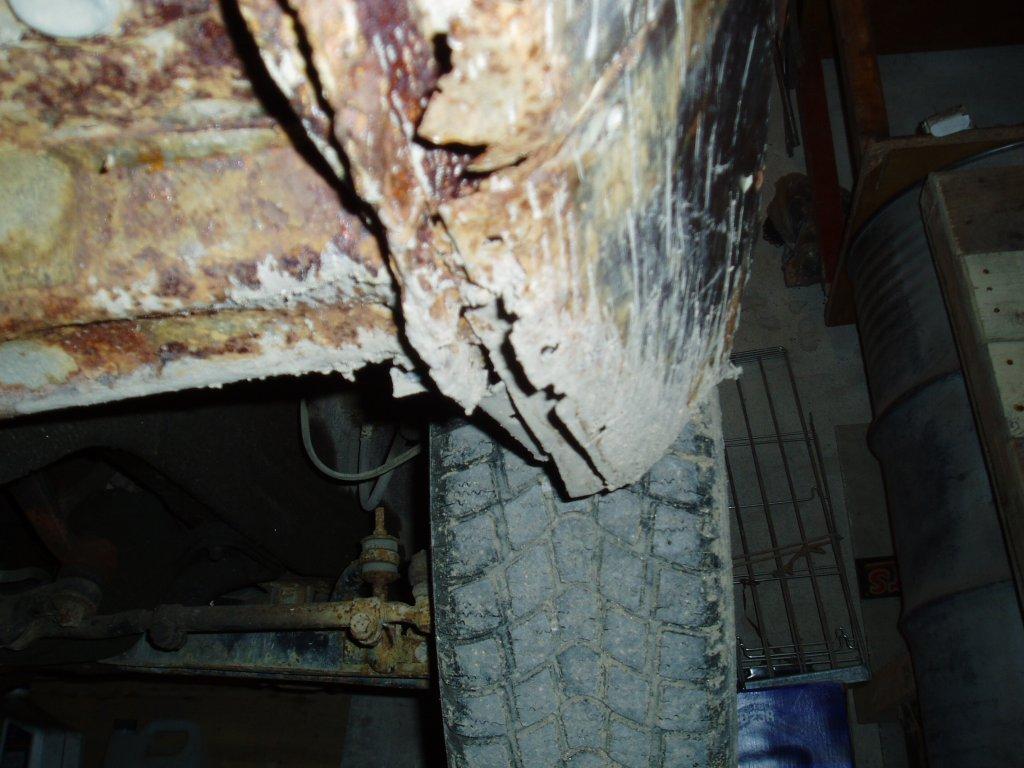
Передние крылья и кузов 30\40х Марков весьма часто имеют сквозную коррозию в нижней части, сразу за передним колесом. Как раз в этом месте осуществляется крепление крыла к внутренним кузовным панелям, а также крепление внакладку пластикового подкрылка к низу крыла. Кроме того, в ряде случаев неподалёку к крылу прикреплен брызговик и конец хром-молдинга из-под двери (у кого всё это есть) и вдобавок где-то здесь начинаются отверстия шурупов молдинга арки крыла.
В общем, дырок и «бутербродов» хватает. Кроме того, все отверстия в крыле соединяют разные детали и получаются вибронагруженными. Вентиляция в этом месте минимальна – её, как правило, не хватает для просушки «в ноль». Именно в таких местах и любит селиться коррозия, тем более что рядом поставщик влаги – колесо, брызги от которого время от времени пытаются естественным образом проникнуть в эту полость при преодолении водных препятствий.
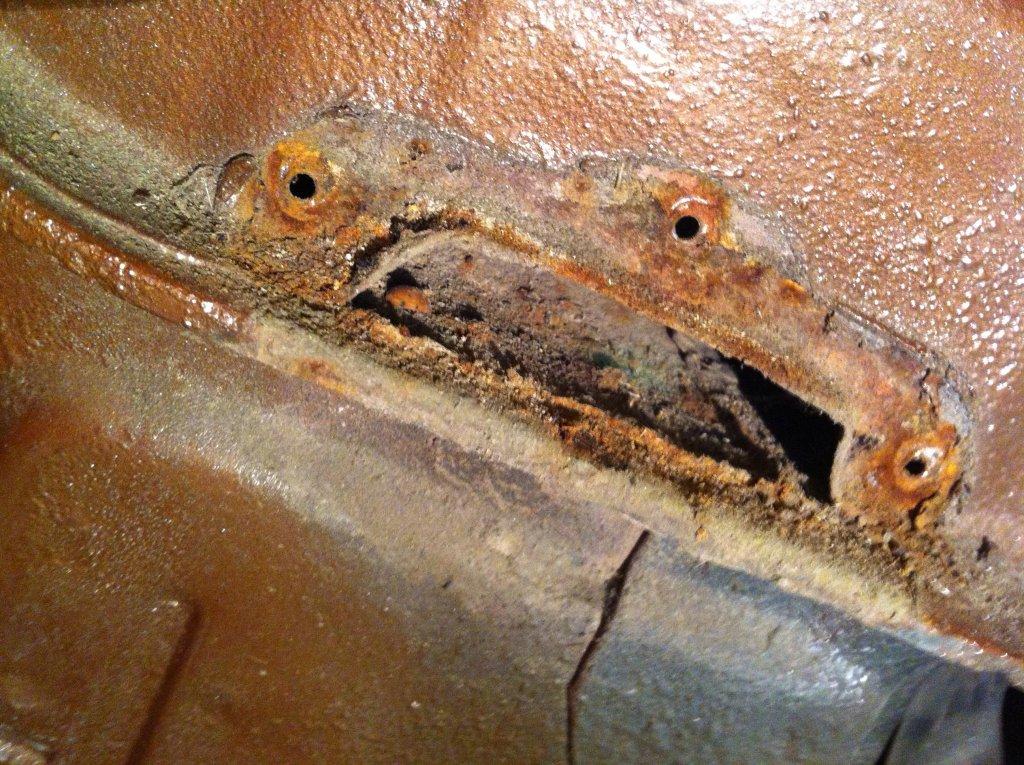
В результате, по прошествии времени мы можем увидеть примерно такую картину:
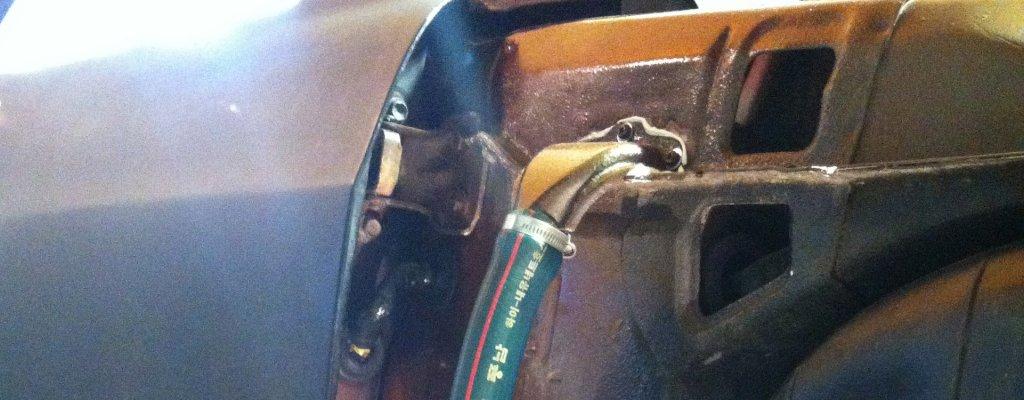
Однако в основном попадание за крыло избыточной влаги, как это ни странно, обусловлено конструктивно. Именно в это место через специальные «гусаки» (на фото) дренируется вода , стекающая с лобового стекла и попадающая внутрь через вентиляционные решетки, что расположены на планке под лобовым стеклом.
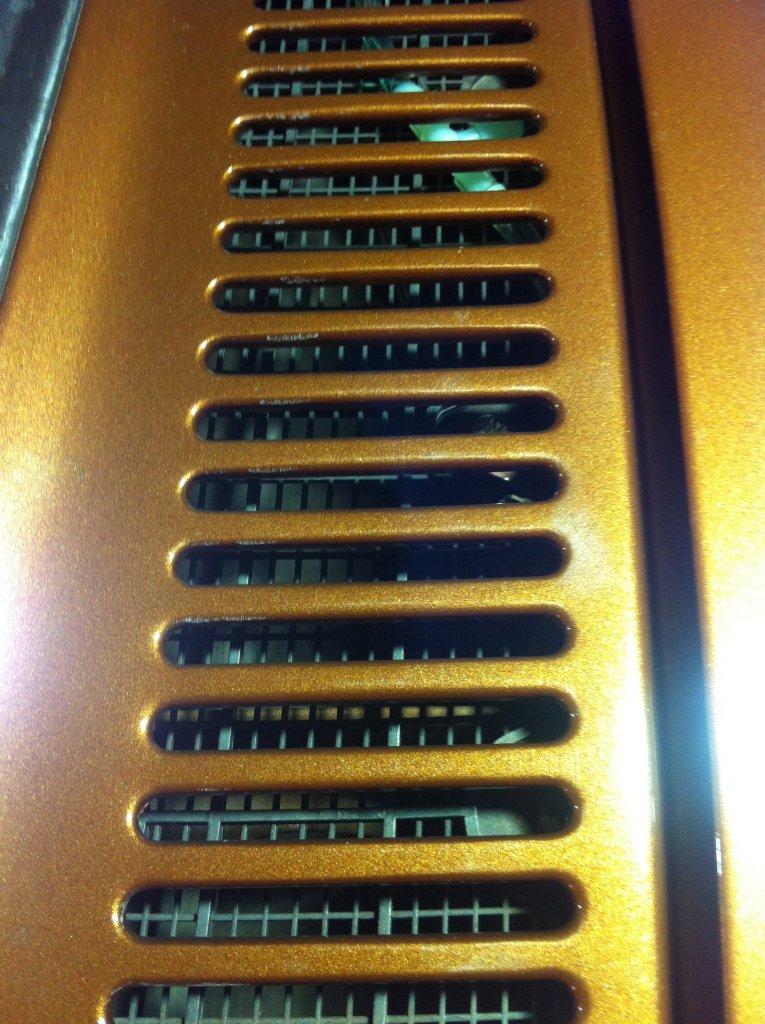
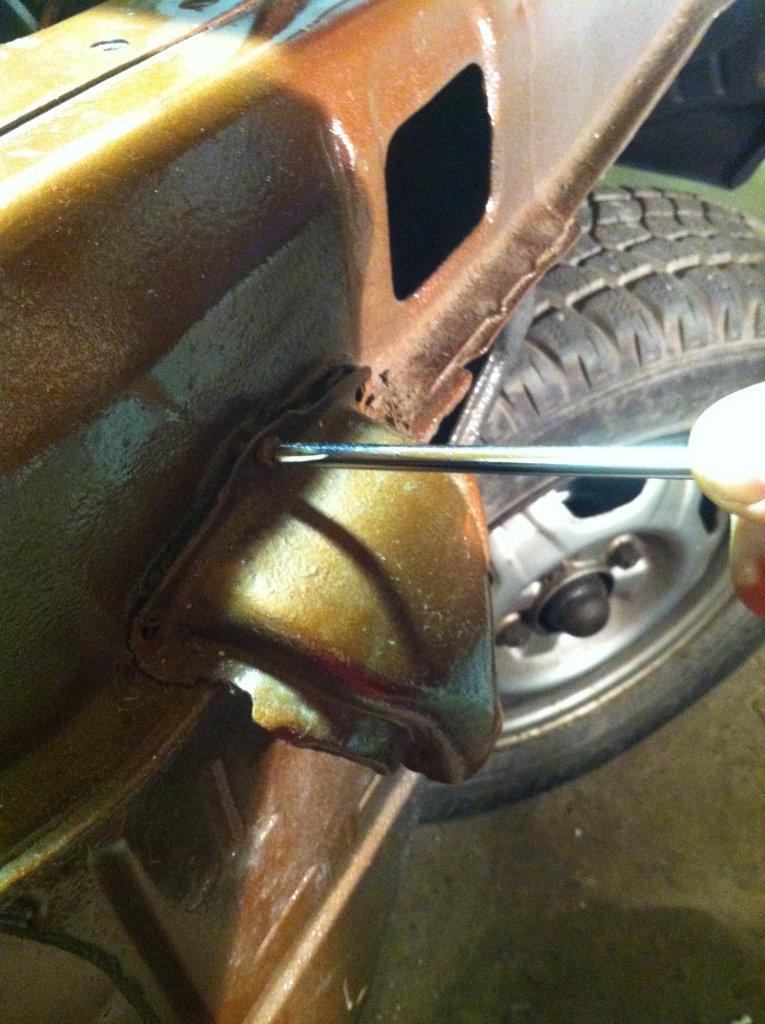
Вроде бы замысел конструктора понятен: во время дождя или при мойке машины вода, попадающая в полость под лобовым, должна спокойно стекать через гусаки, и далее через неплотные соединения в нижней части крыльев стекать на землю. Очевидно, что на практике происходит не совсем так, и часть воды задерживается внутри нижней части крыла, где и начинает своё «чёрное дело». Знаю также, что в наших условиях как раз в «кармане» за колесом имеет свойство со временем скапливаться тонкосеяный песок и пыль, и эта постоянно увлажняемая масса «приканчивает» металл крыла изнутри довольно быстро. Поэтому от самого факта, что и без того достаточно проблемное место стыка крыла и внутренней панели ещё и постоянно «орошается» свежей водичкой, становится как-то не по себе 🙂
Знаю, что сие орошение тревожит не одного меня. Так, в своё время я встречал различные способы переделки дренажа на «Тойотах» на более безвредный – к примеру, однажды упомянутые выше гусаки перенесли в моторный отсек. Правда, там была ещё одна причина для переноса, но о ней я рассказывать не уполномочен 🙂
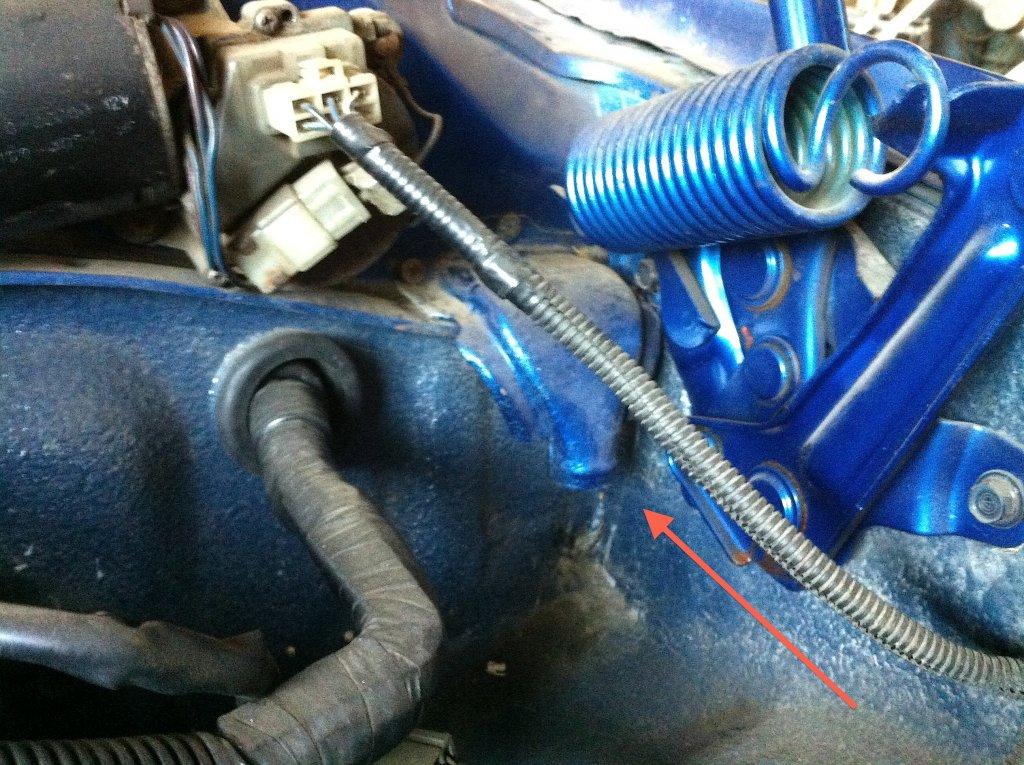
Я решил переделать свою «водосточку» немного по-другому – а именно, продолжить её до самой нижней точки гибким шлангом и вывести сквозь подкрылок.
Первым делом я демонтировал гусак и максимально устранил коррозию в месте его примыкания – а её, как видите, там хватает.
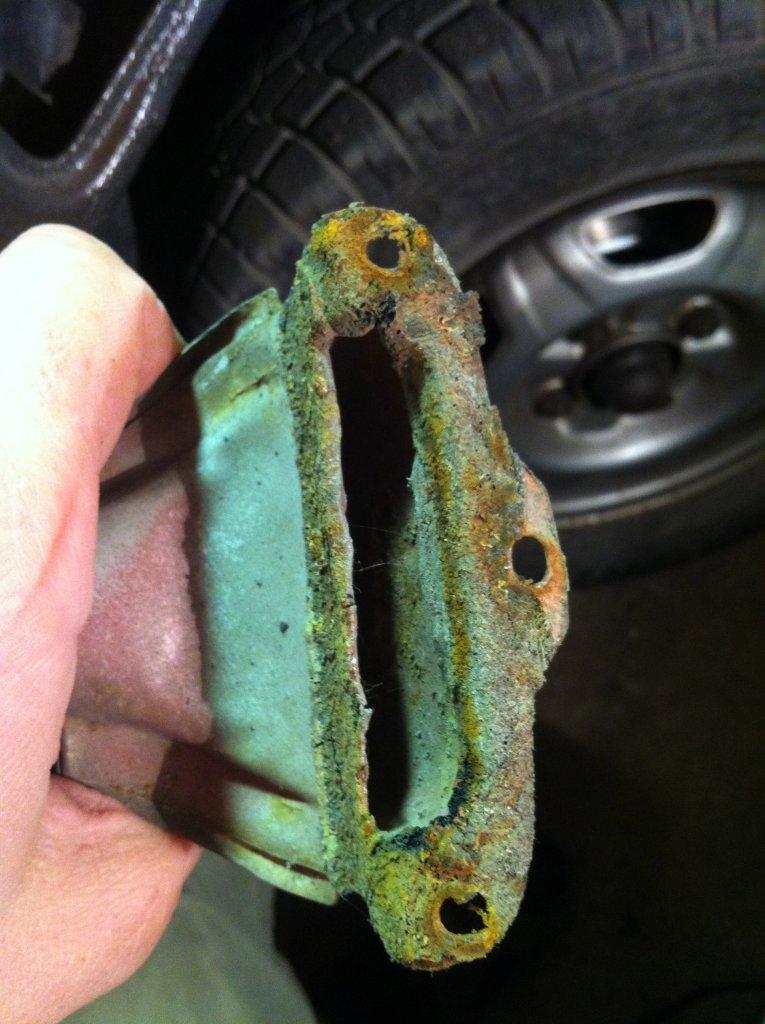
Затем насадил на него шланг подходящего диаметра и закрепил его хомутом.
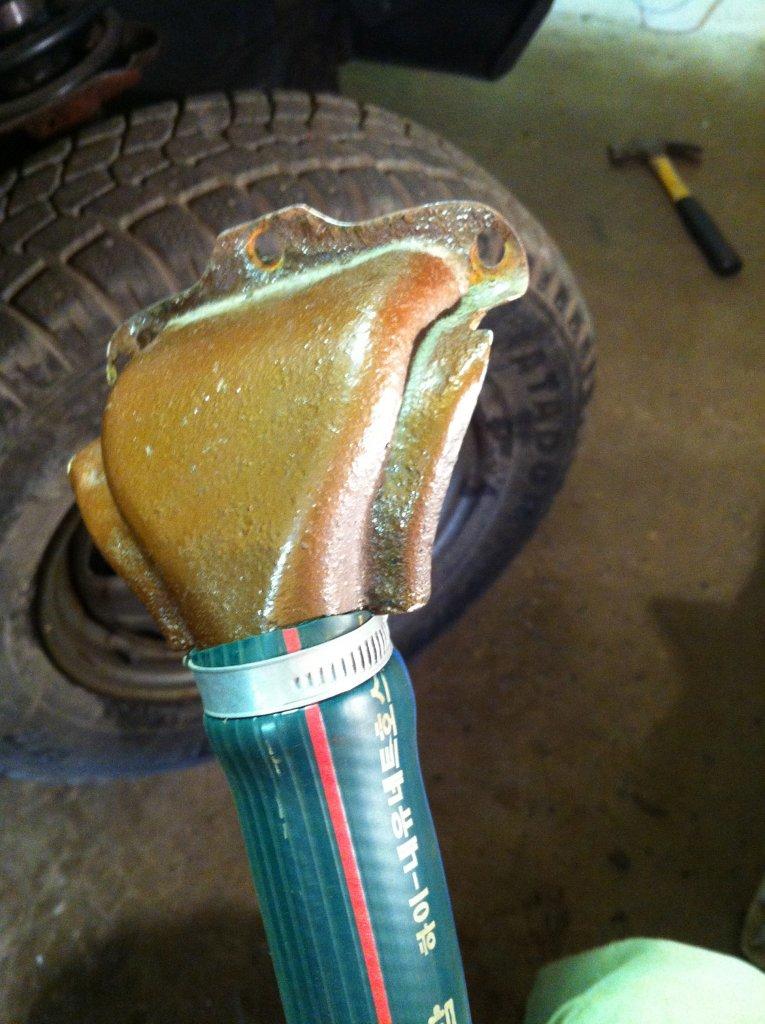
Далее нанёс герметик на место крепления гусака, и прикрепил его на место.
Теперь оставалось решить вопрос с нижней частью. Я решил, что нижний конец дренажного шланга должен быть установлен как можно жестче и плотнее – во избежание вибраций, а также для сохранения условной «герметичности» пространства за подкрылком. Однако сам по себе подкрылок – это гибкая и подвижная деталь, меняющая геометрические размеры в зависимости от температуры. Вдобавок обязательным условием было сохранить возможность его снятия и установки– это может понадобиться в процессе обслуживания авто в дальнейшем. Поэтому для нижнего конца шланга я применил пластиковое быстроразъёмное соединение (БРС) типа «головка Богданова» — подобно тому, которое применяется в пожарных шлангах, знакомых нам с детства, только меньше.
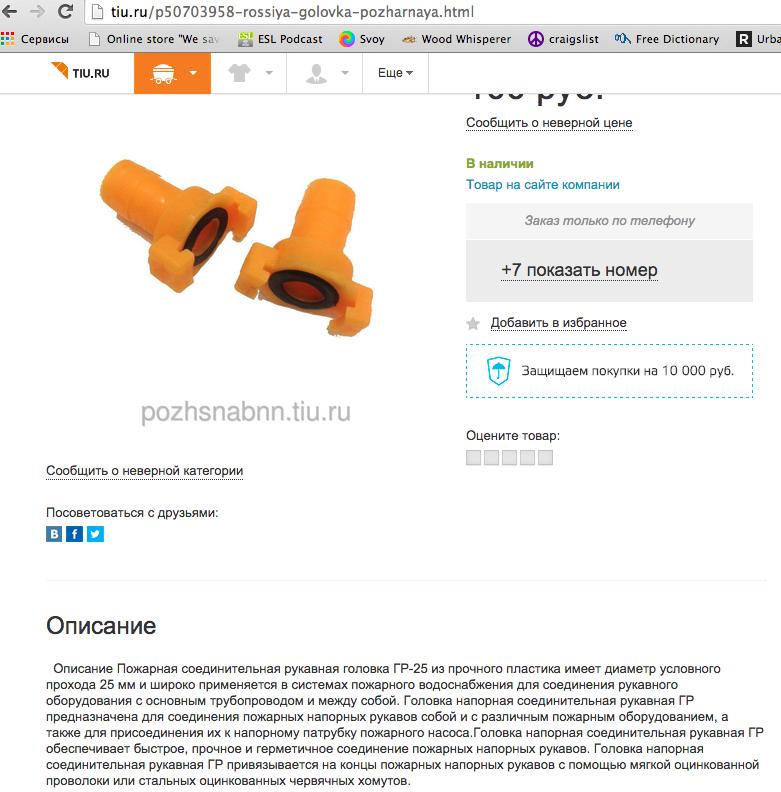
Один конец я закрепил в подкрылке, а на другой насадил шланг.
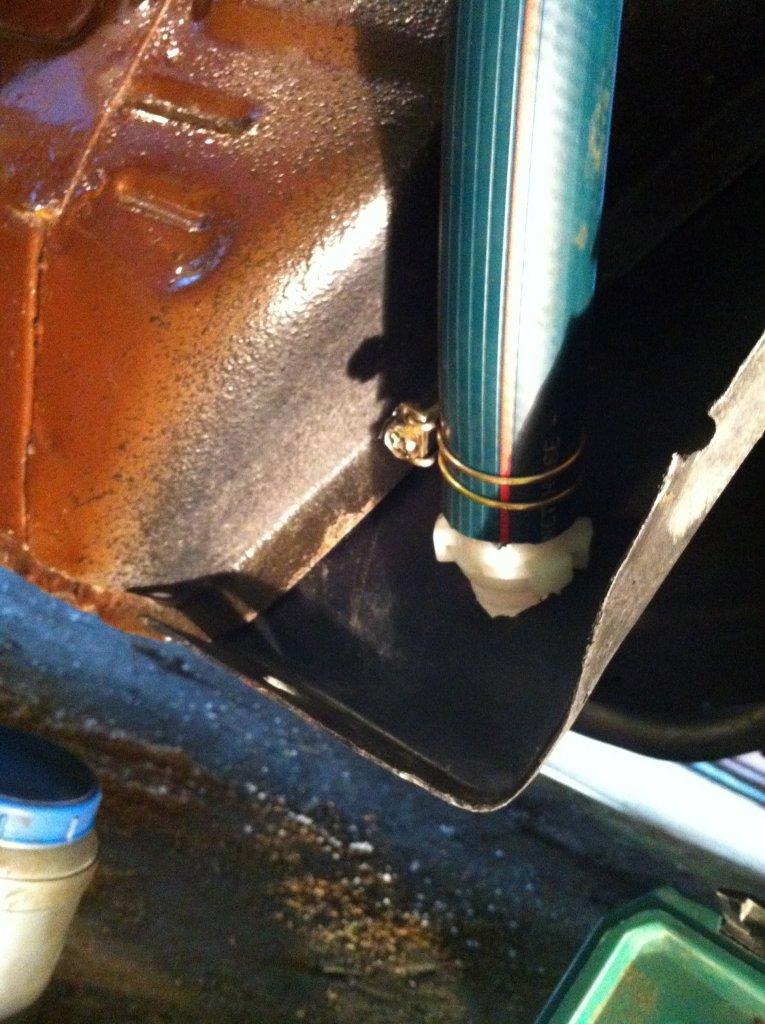
Так была реализована возможность быстрого отсоединения шланга от подкрылка в случае необходимости.
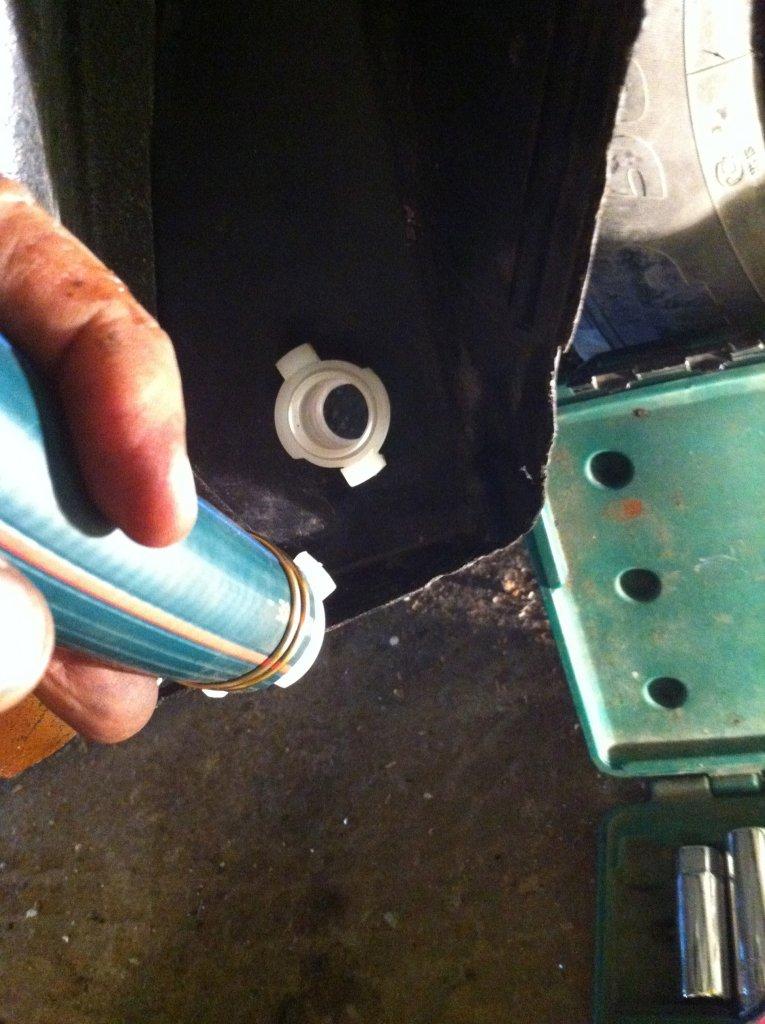
Слив выведен сквозь скрытую, заднюю часть подкрылка, снаружи почти невидим, и потому «не мозолит глаза». При установленном на место крыле дренажный шланг изнутри его не касается.
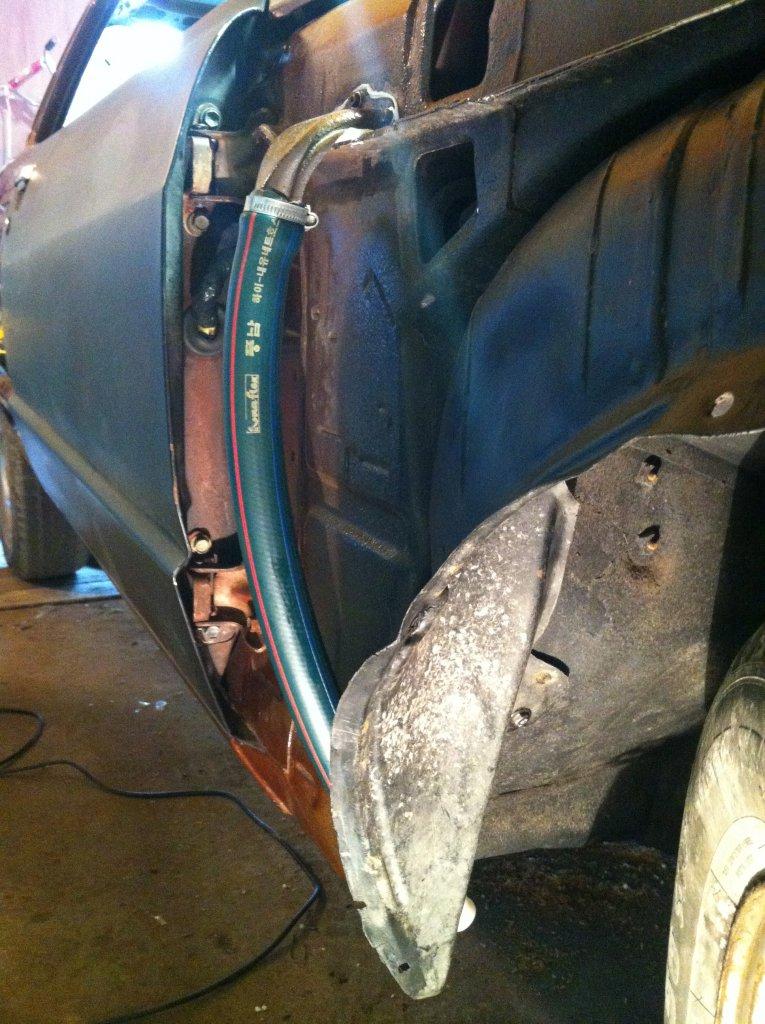
Дальнейшая эксплуатация и наблюдения показали, что идея работает, и хотя бы часть попадающей за крыло воды удаётся «убрать из меню» вечно голодной леди Corrosion.
Вот такой вот «колхоз» на ровном месте 🙂
Комментарии
Пока нет одобренных комментариев.